Channels
WhatsApp Bots powered by ChatGPT
The WhatsApp channel allows you to interact with your bot via WhatsApp! Use it to create bots for your customers, colleagues and friends!
WhatsApp quick start
If you want to get setup with WhatsApp quickly, check out the video below:
Create a Business Manager
Before you start
You’ll need a personal Facebook profile to confirm your identity.
Before you can connect Chat Thing to WhatsApp, you need to create a meta business account, If you already have one of these you can move onto the next section. If not, Meta provide instructions for how to set one up here: meta business account setup
Creating a WhatsApp application
Next, you can move on to creating a WhatsApp application for your bot.
- First, you need to create an application here: meta applications.
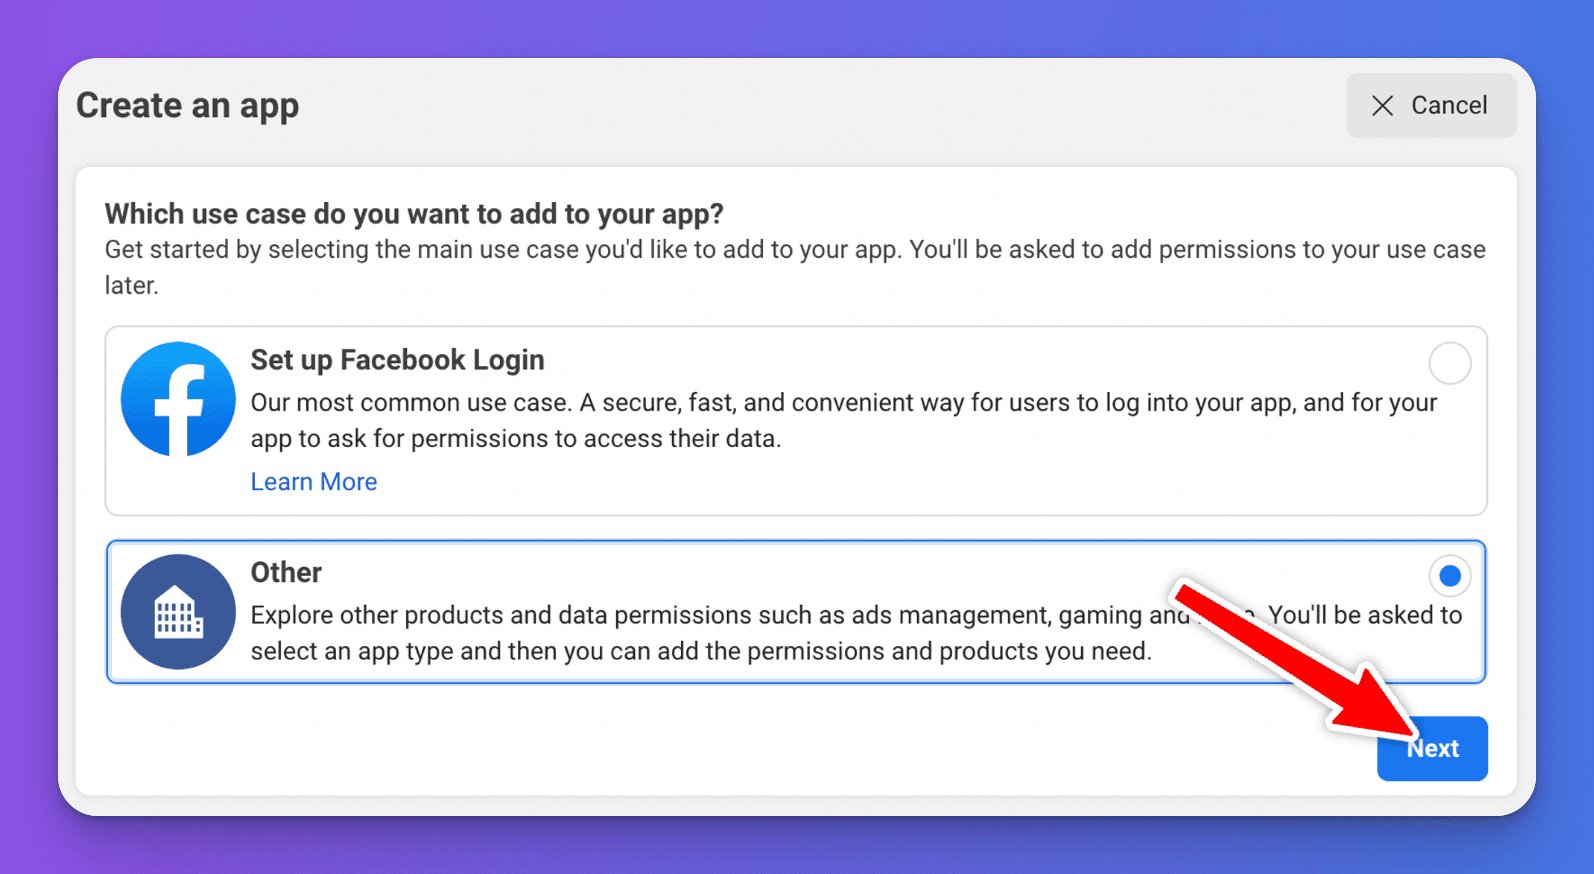
- Click the “Create App” button in the top right.

- Select Other as the use case & click the “Next” button.
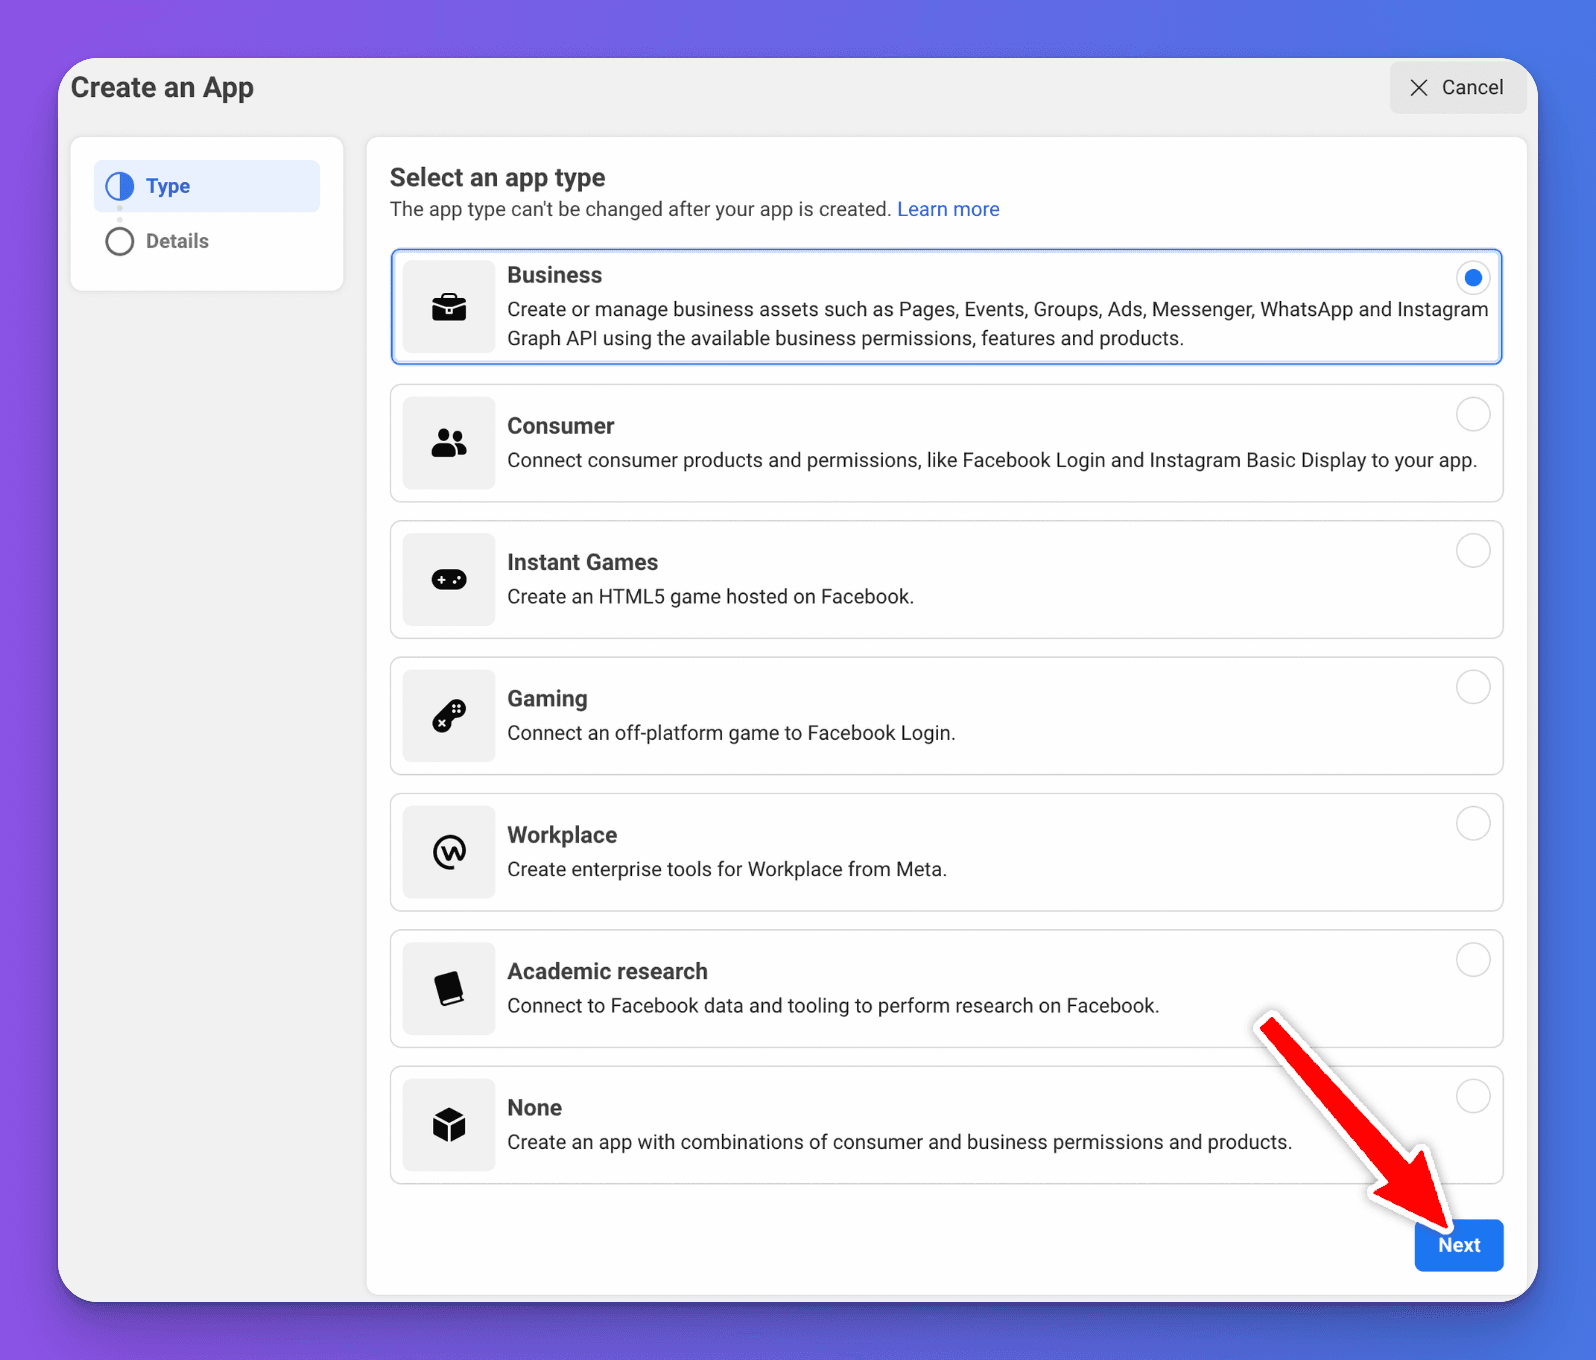
- Select Business as the app type & click the “Next” button.
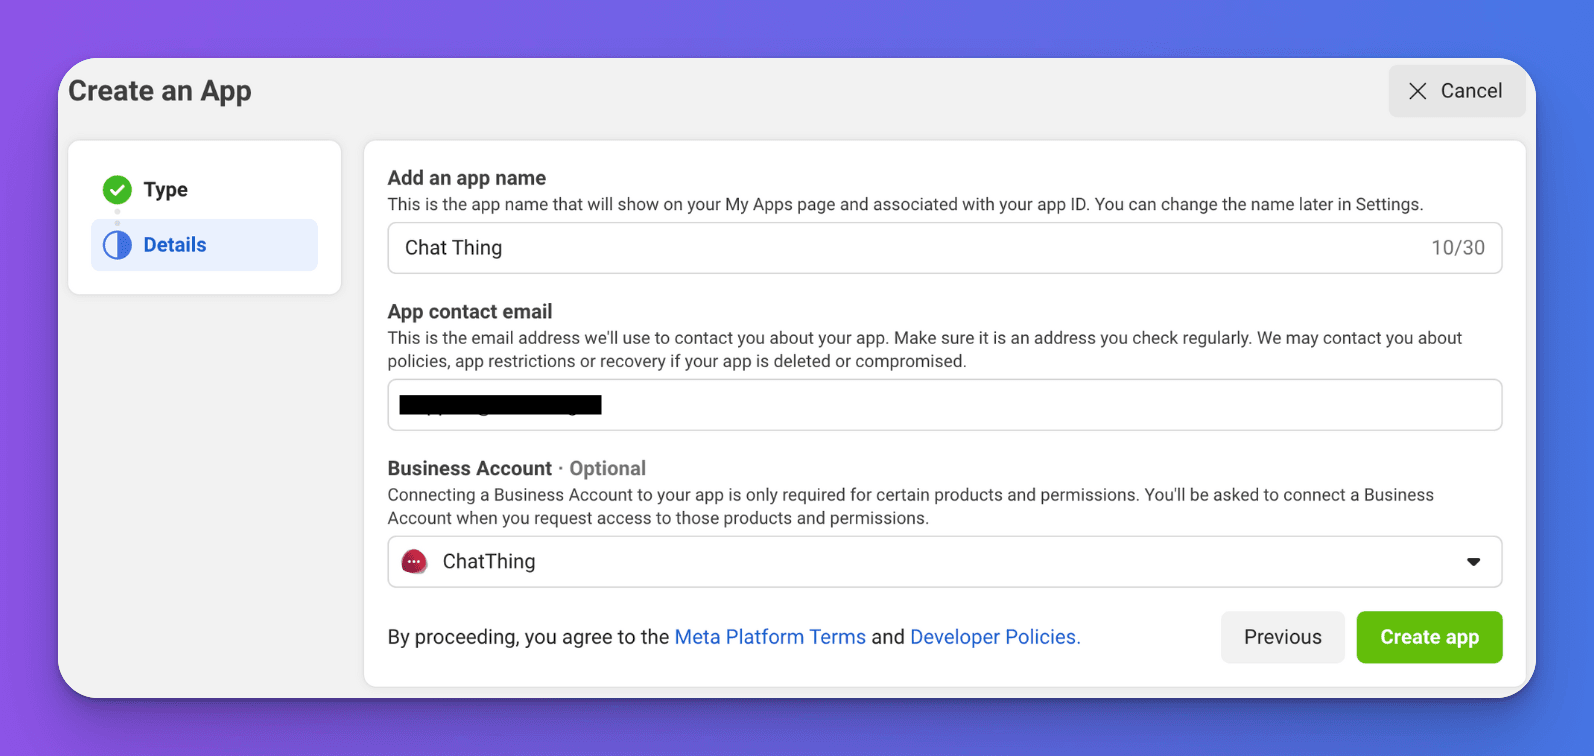
- On the “Create an App” screen, you’ll need to provide the following information:
- Application name
- Application contact email
- Select the business account you created earlier
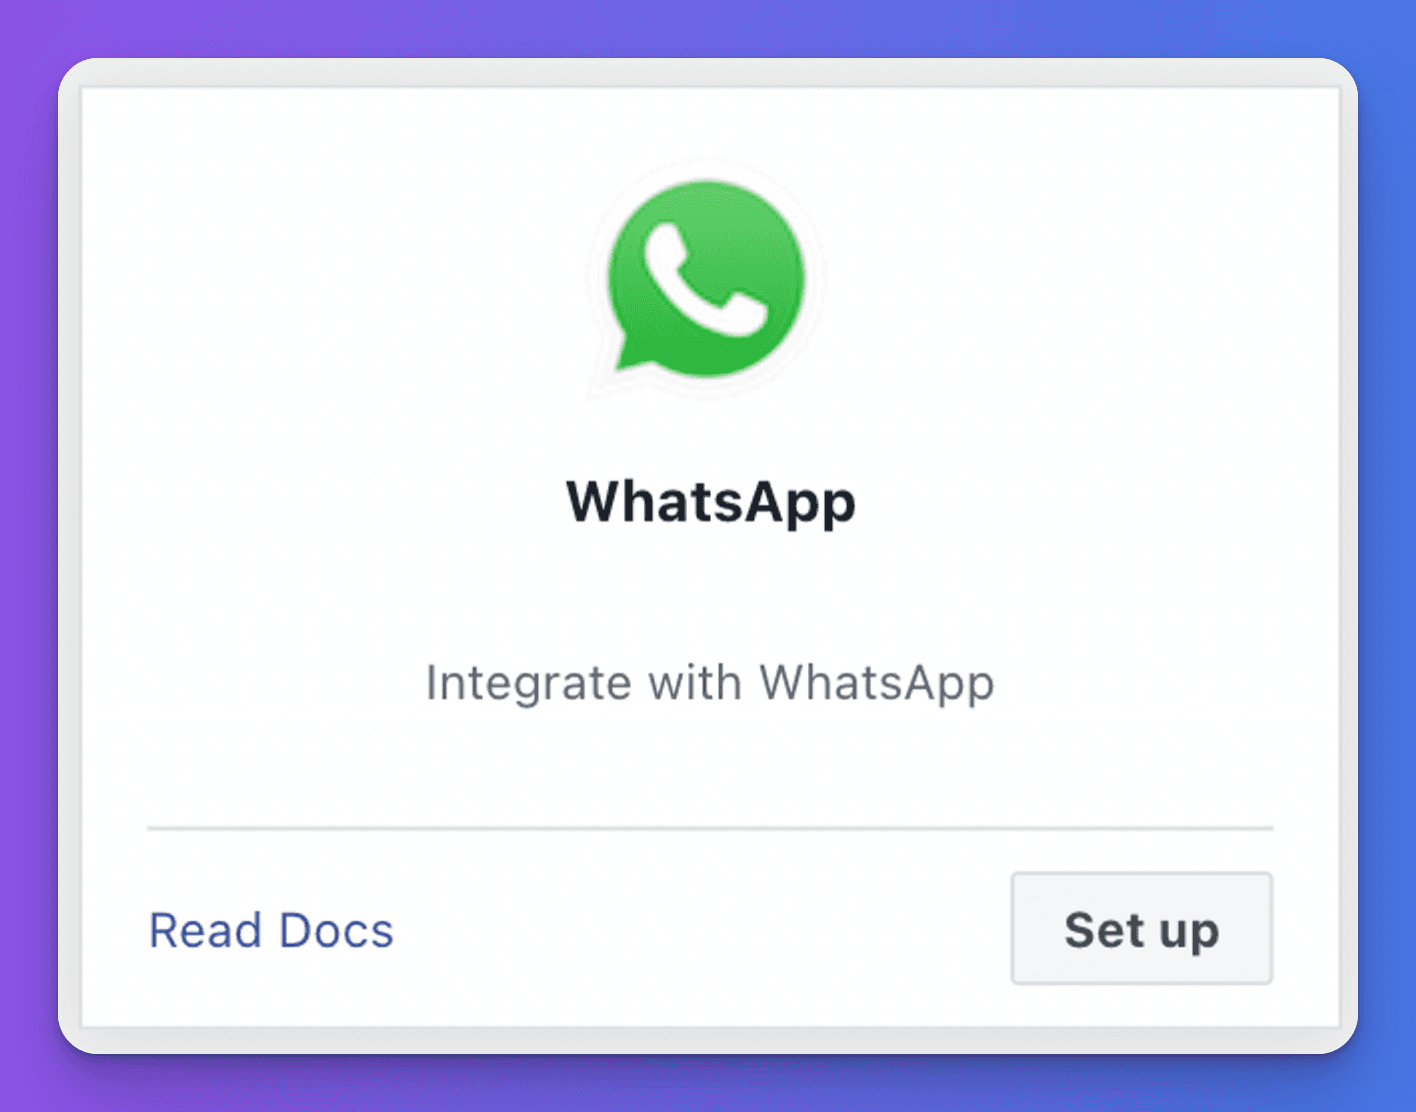
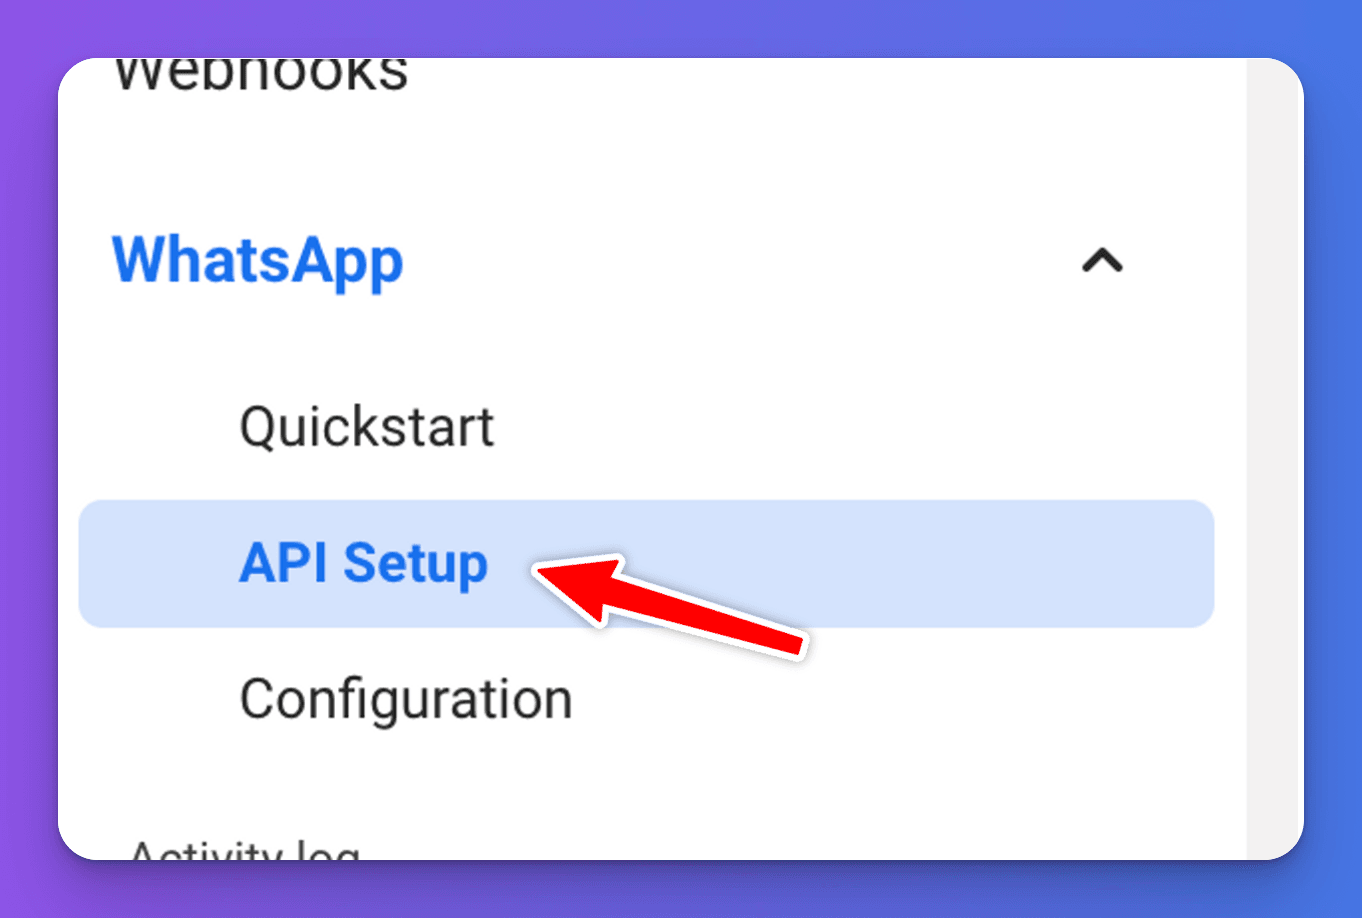
- Next, you should find yourself on the Meta for Developers > App Dashboard in the main area scroll down and find the WhatsApp product and click the “Set up” button.
- Next, click on “API Setup” under “WhatsApp” in the sidebar.
- Here we can obtain a temporary access token. This will need to be updated to a permanent access token later on, but for now let’s continue with a temporary token.
Copy the “Temporary access token” at the top of the page.
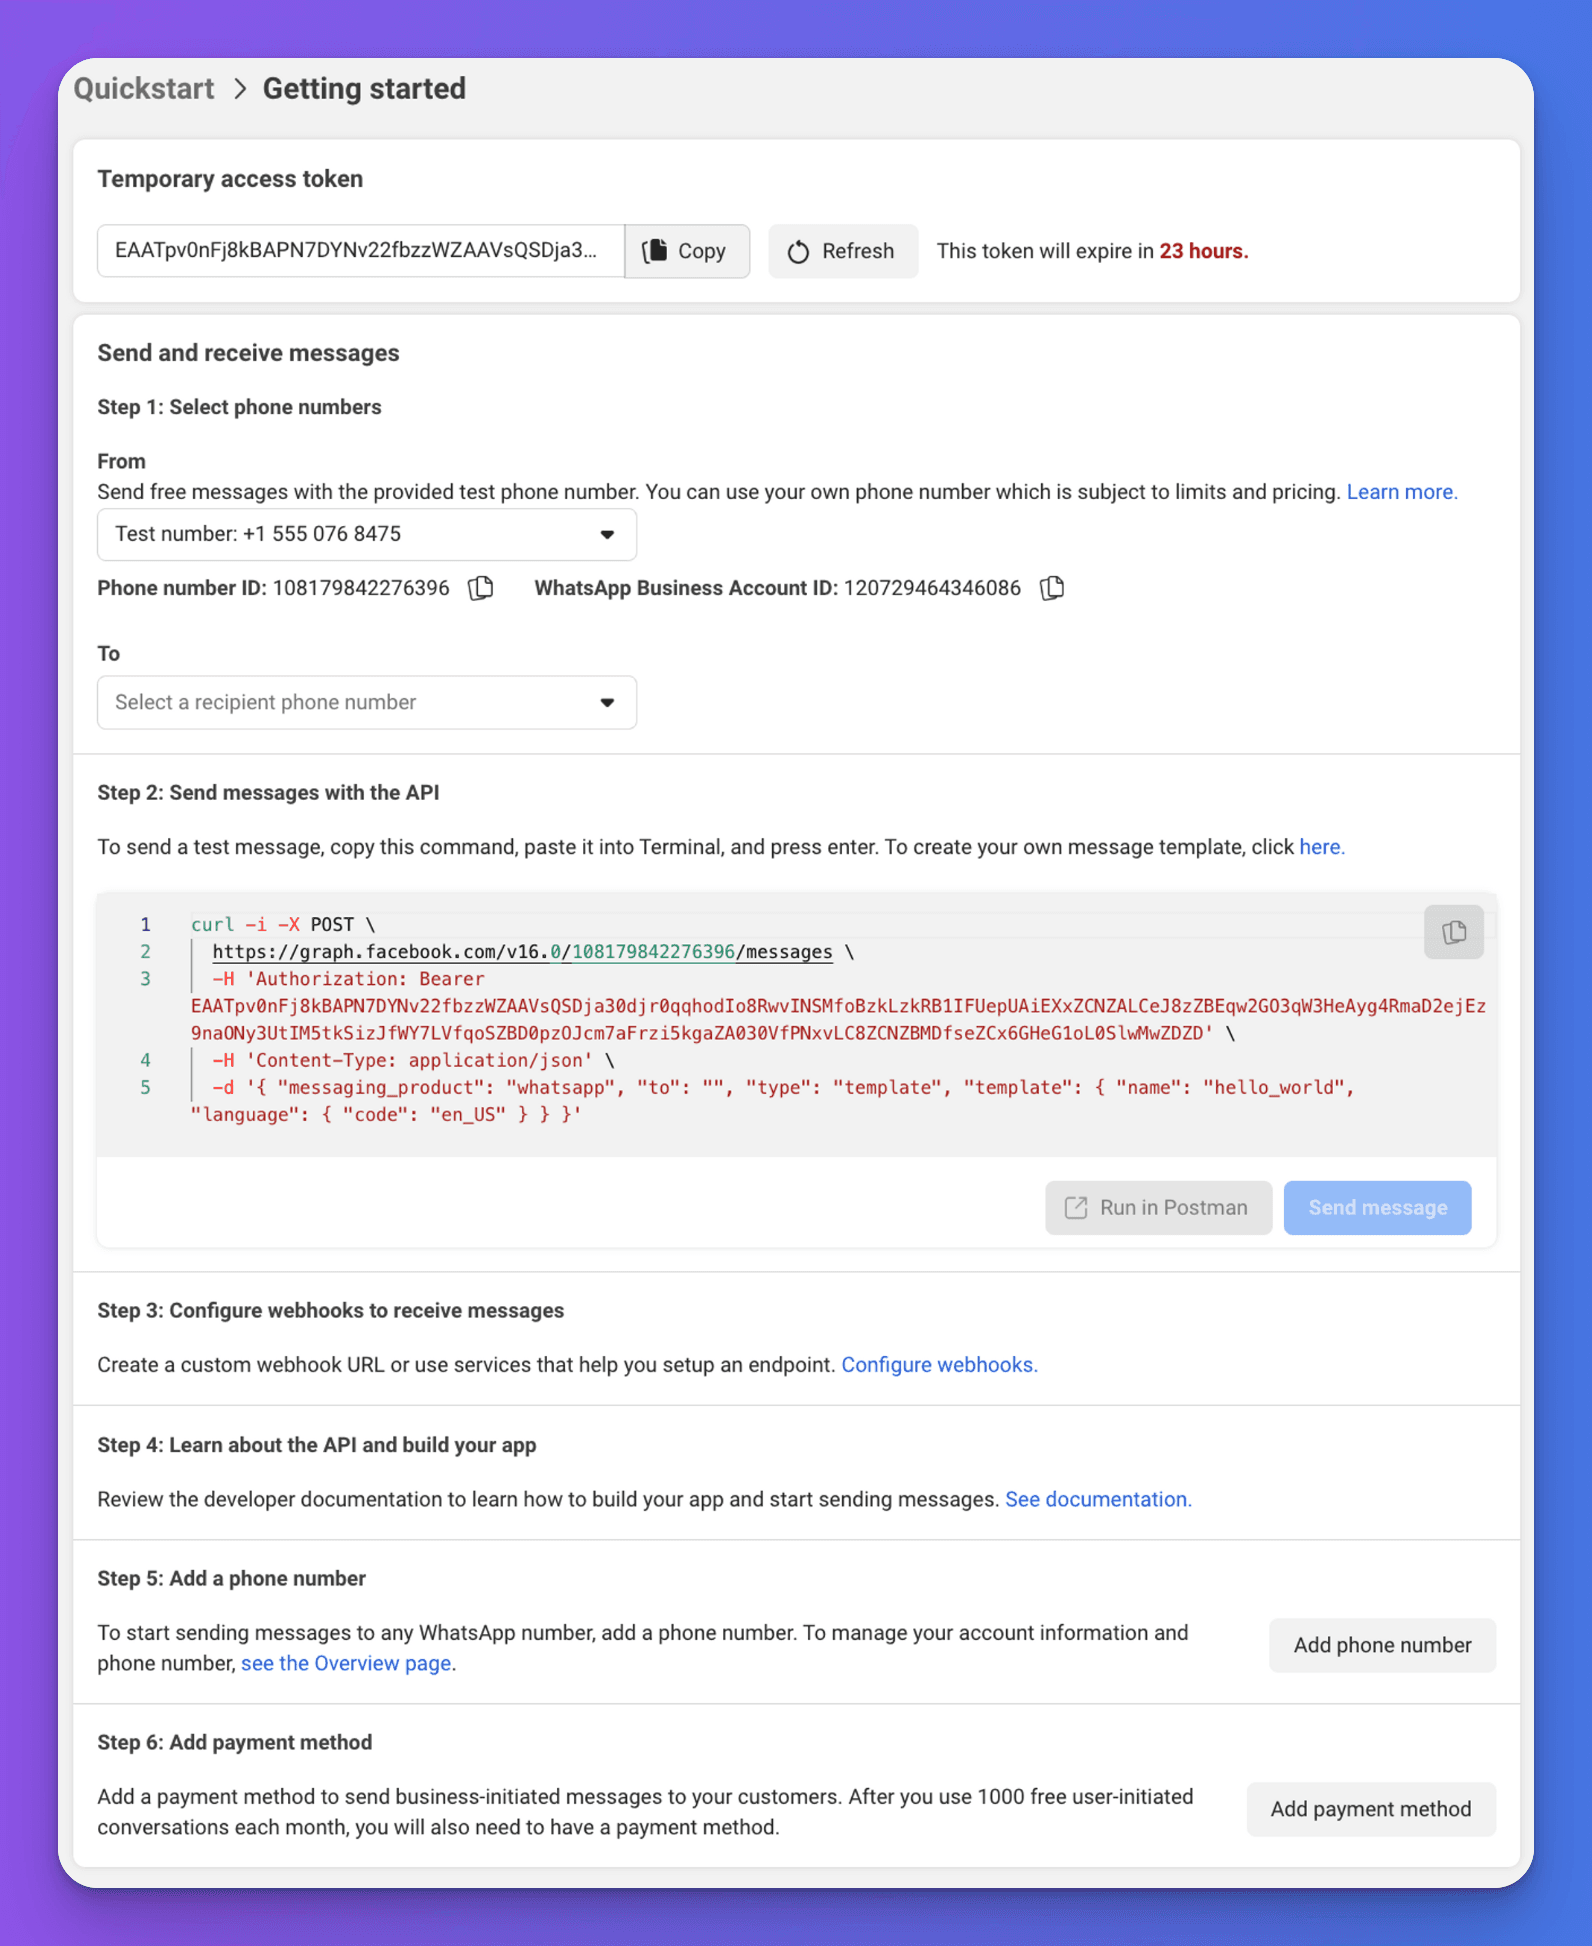
- We’ll need to return to Meta at various points so leave this screen open.
Then, to complete the rest of the setup head back to your bot dashboard in Chat Thing.
Connecting your bot to WhatsApp
Before you start
The WhatsApp integration is only available on Standard, Pro and Enterprise plans.
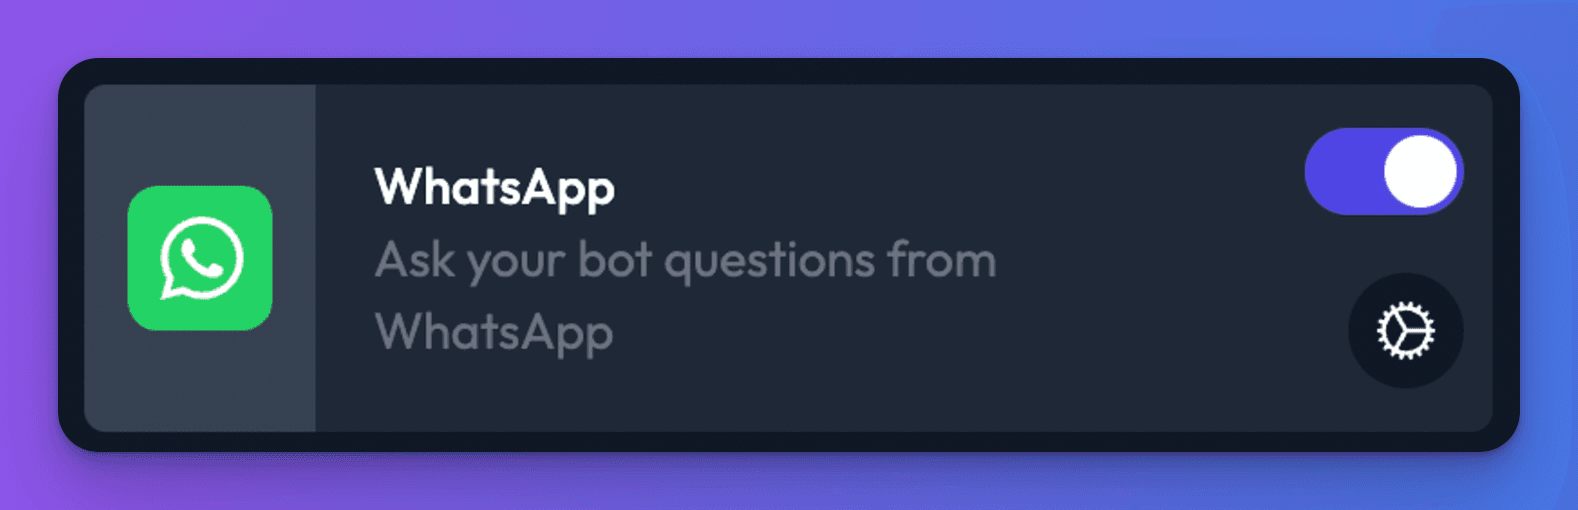
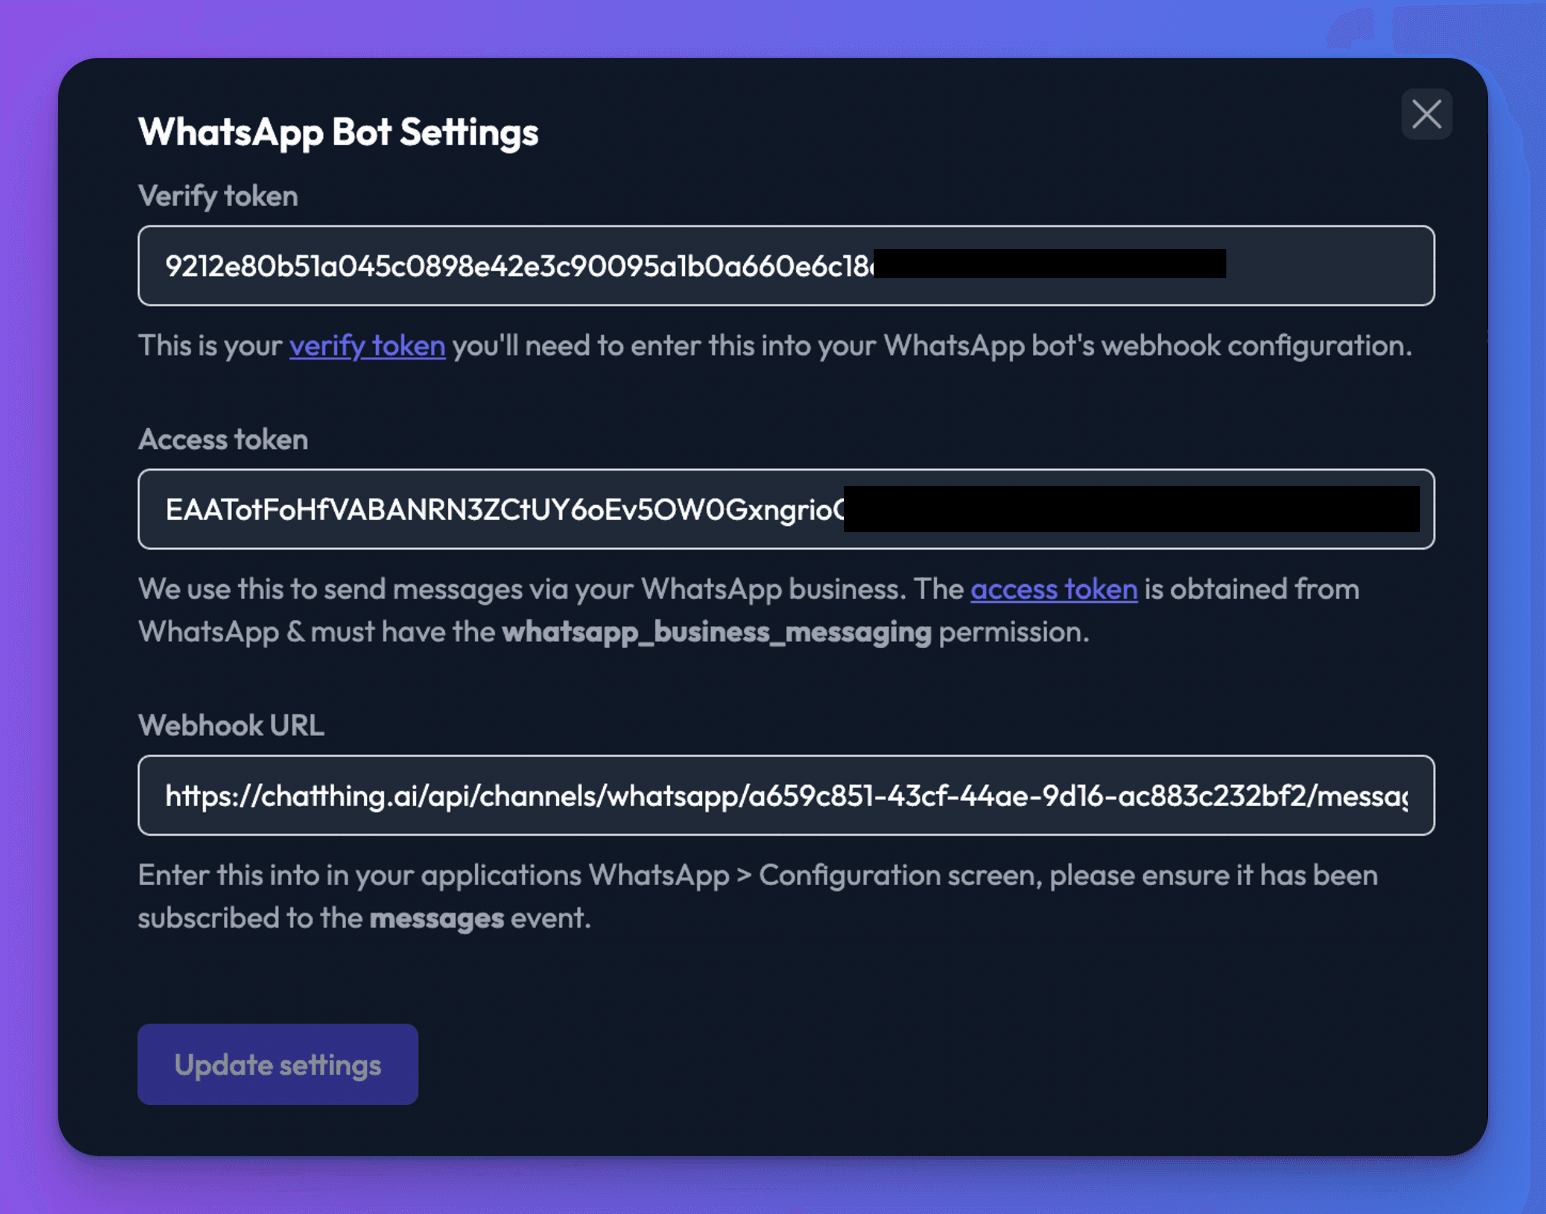
- From the your bot dashboard, go to the Channels tab and enable the WhatsApp channel by clicking its toggle switch.
- In the setting window that appears (if it doesn’t appear click on the cog icon), then paste the access token we setup earlier & click “Update settings”
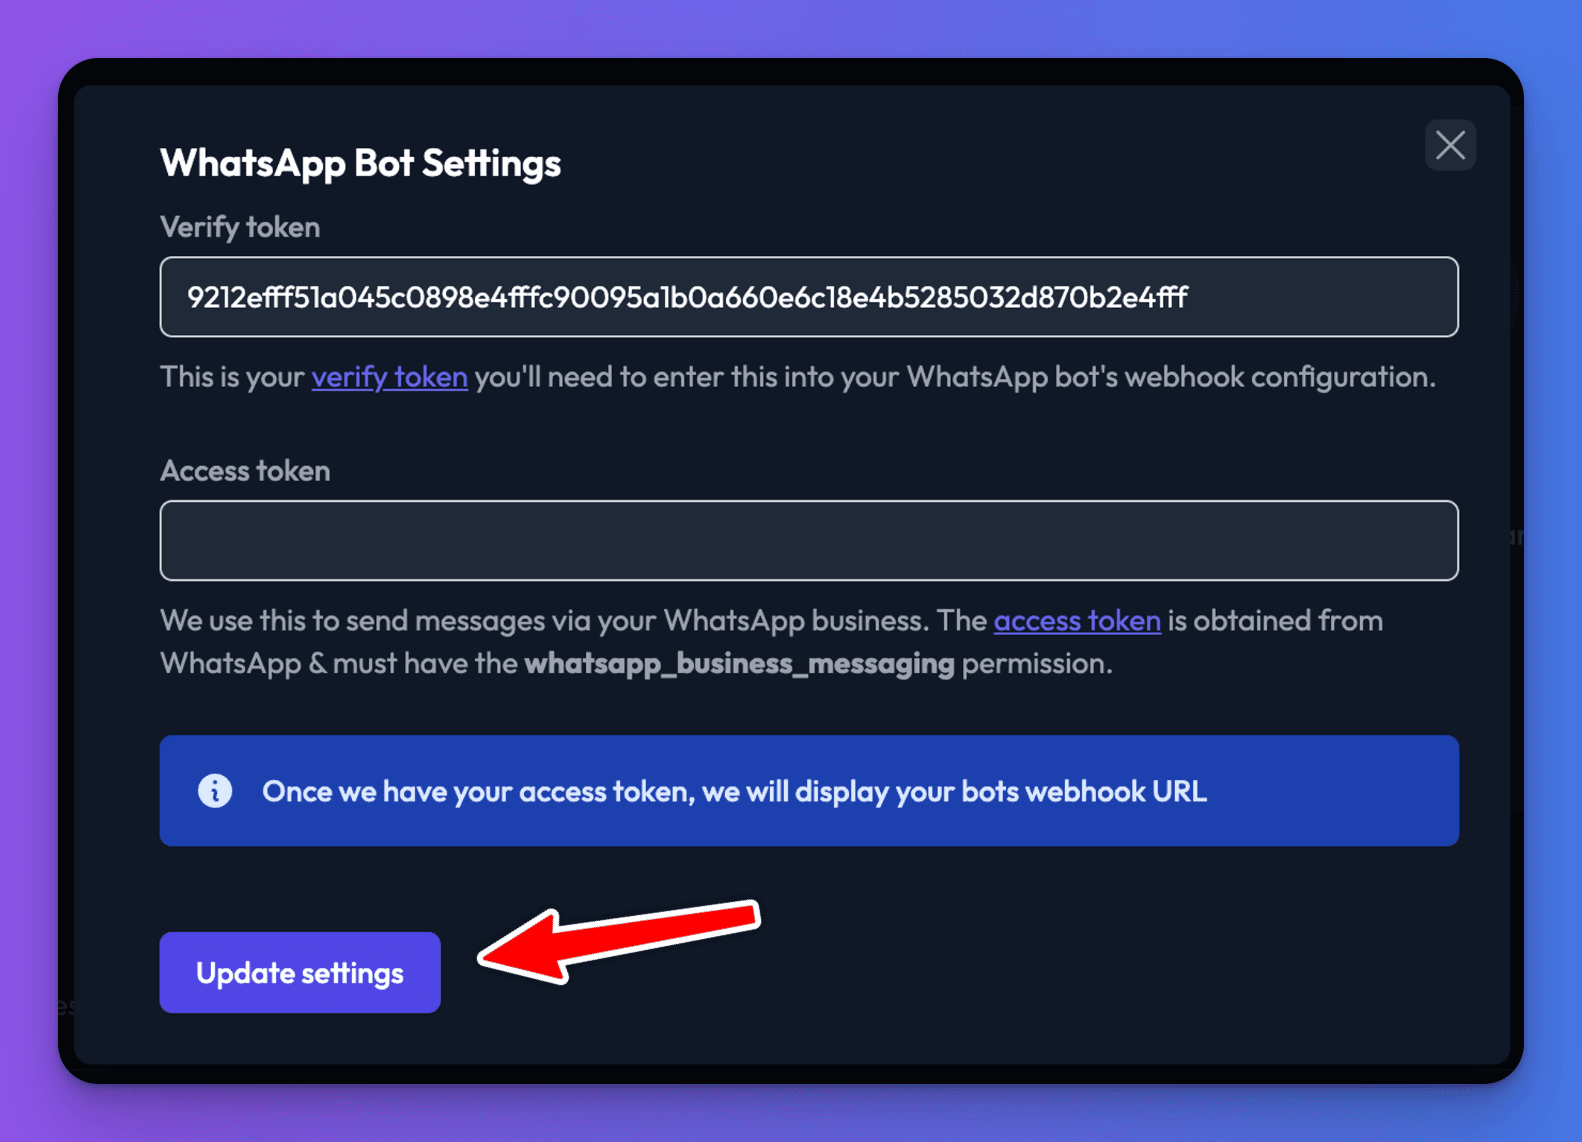
- After entering your access token & clicking on the “Update settings” button, you should be provided with a webhook url which you’ll need to provide to Meta along with the verify token, in the next steps.
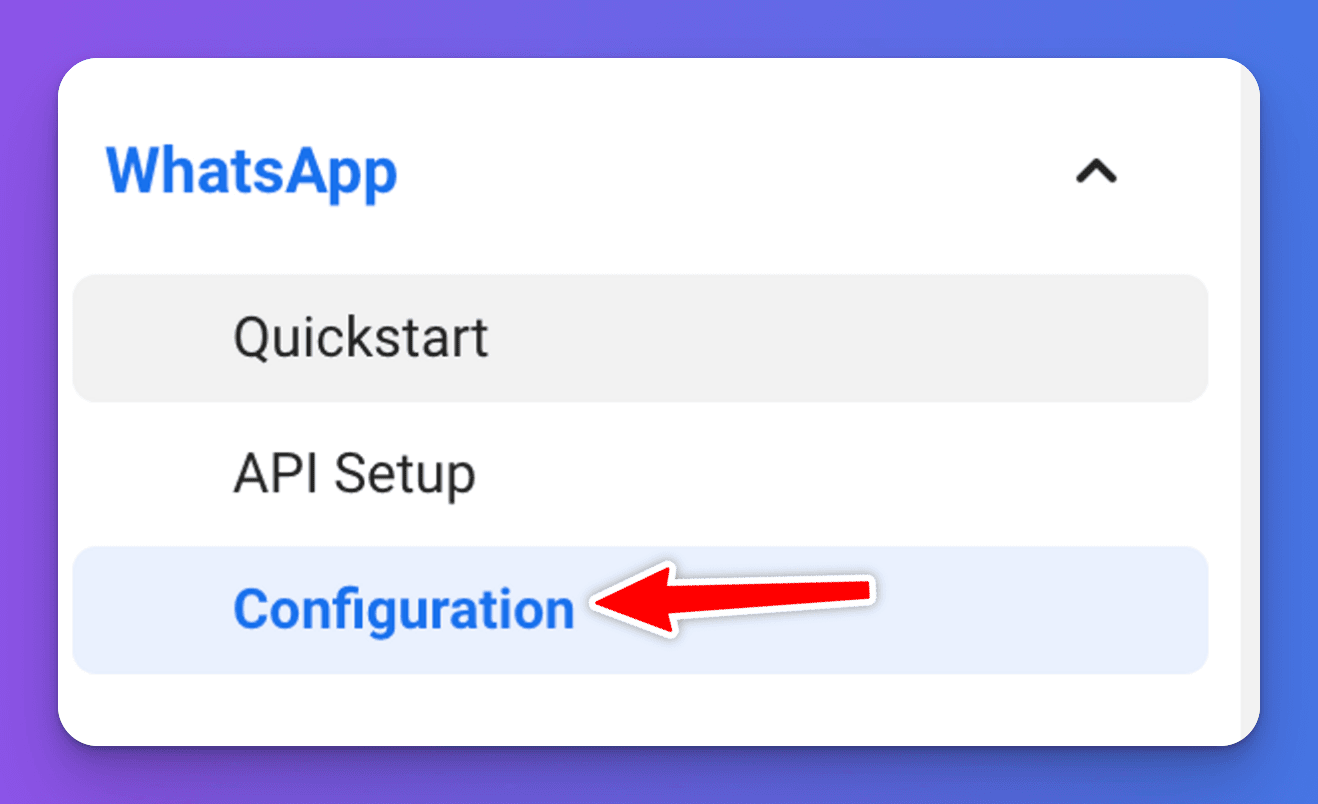
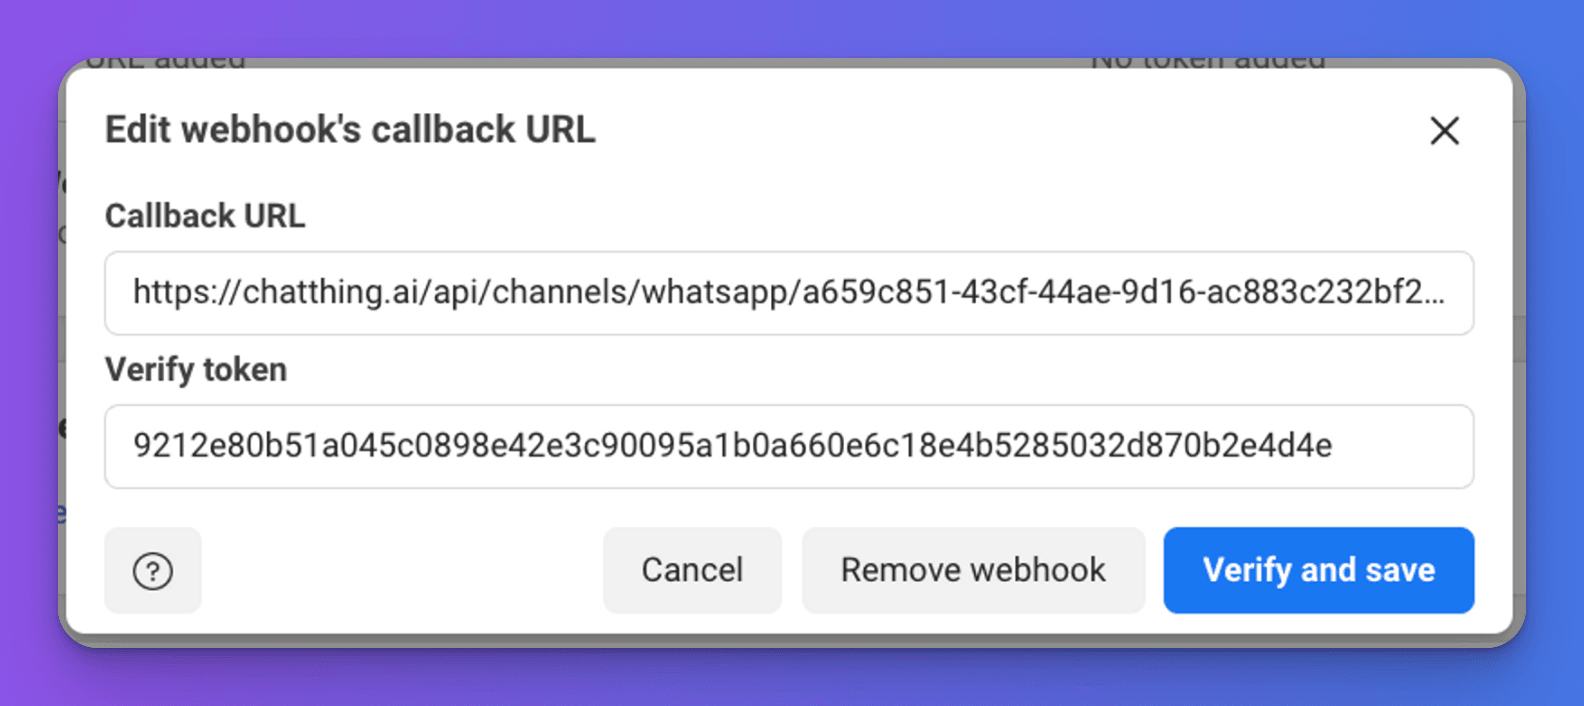
- Go back to the Meta developers site. Click the “Configuration” link under “WhatsApp” in the sidebar.
- Next, you need to click the “Edit” button and copy the callback URL + verify token from the WhatsApp channel settings dialog in ChatThing. Then, client Verify and save. If you’ve completed these steps correctly, verification should complete.
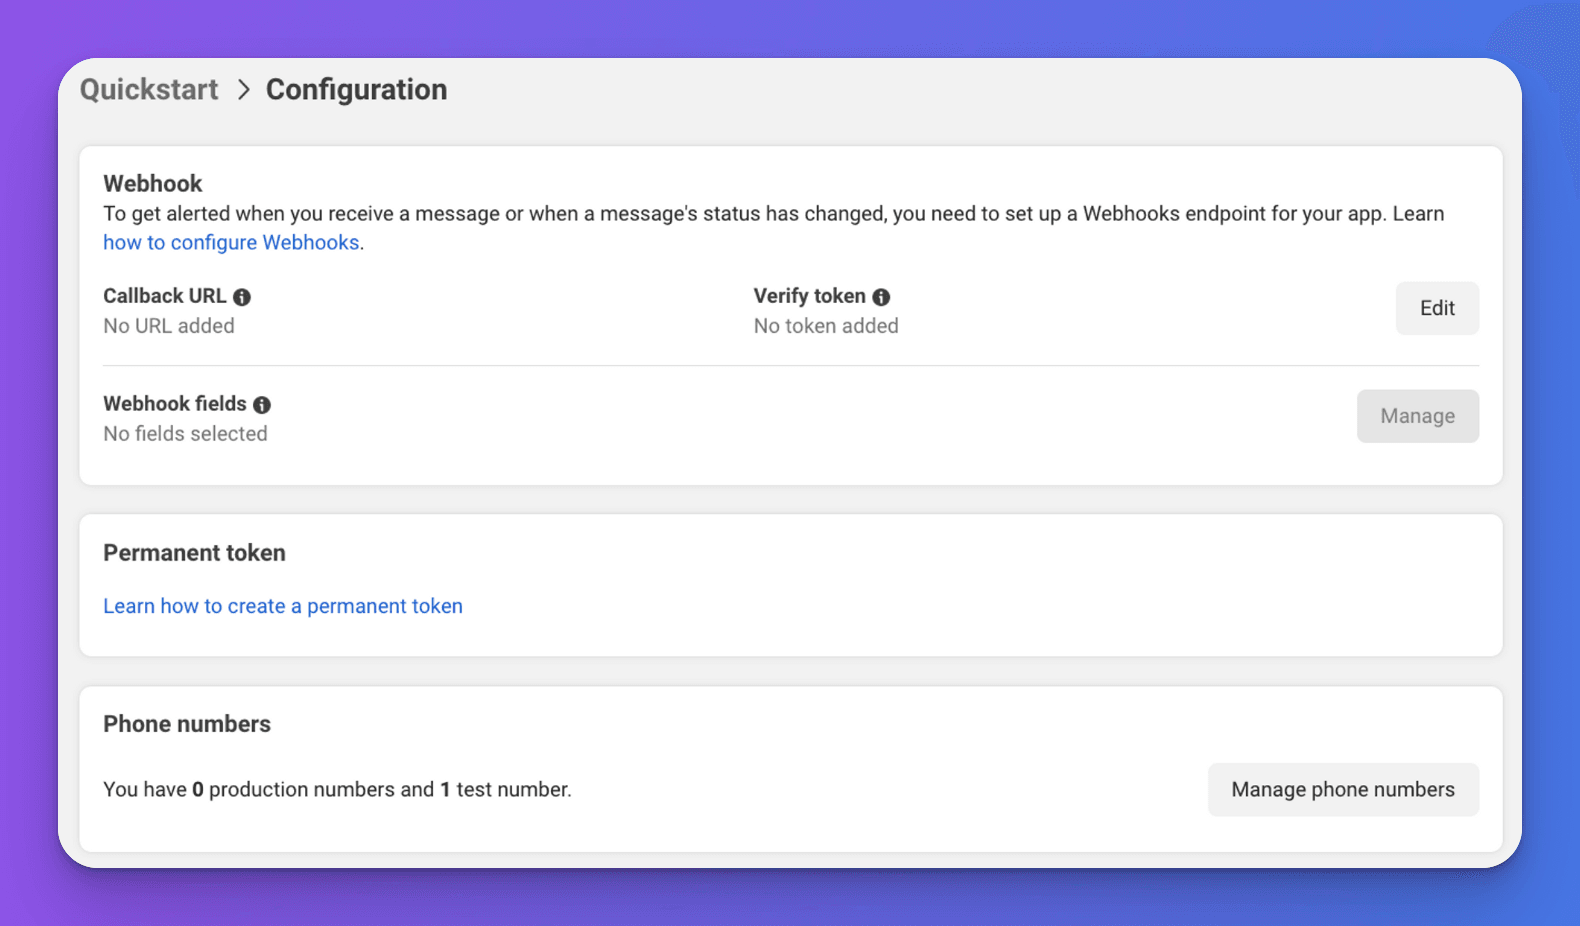
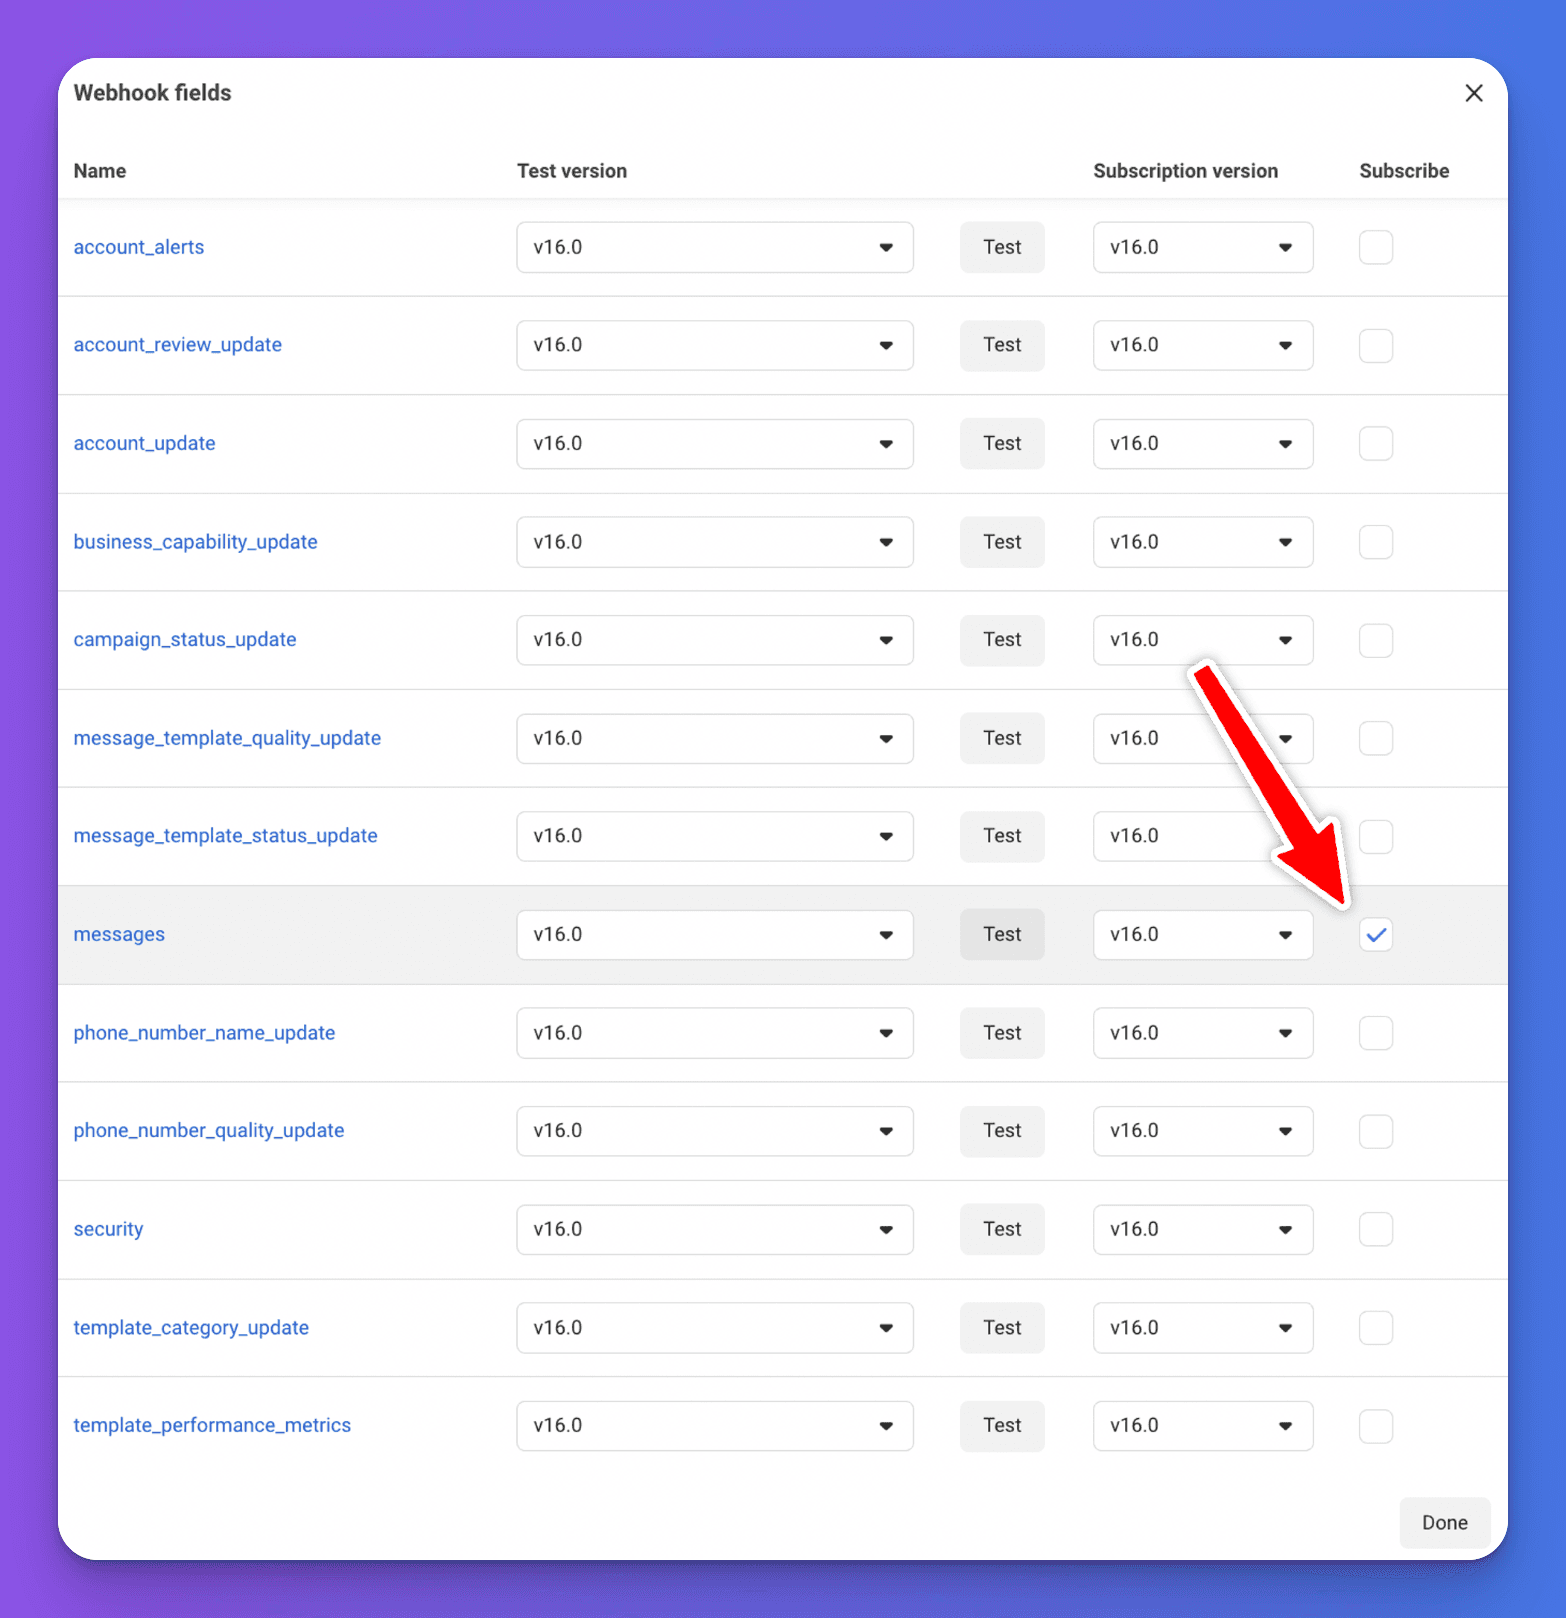
- Next, you’ll need to configure the fields for your webhook, by clicking on the “Manage” button next to Webhook fields. In order for your bot to receive messages, you’ll need to subscribe to “messages” events by ticking the “subscribe” tick box on the messages row.
When you click “Done”, you should see “messages” under Webhook fields as per the screenshot.

- Now, you should be ready to test your bot. To do this, make sure you’ve added your phone number as a Recipient phone number & that your business account has a test phone number setup.
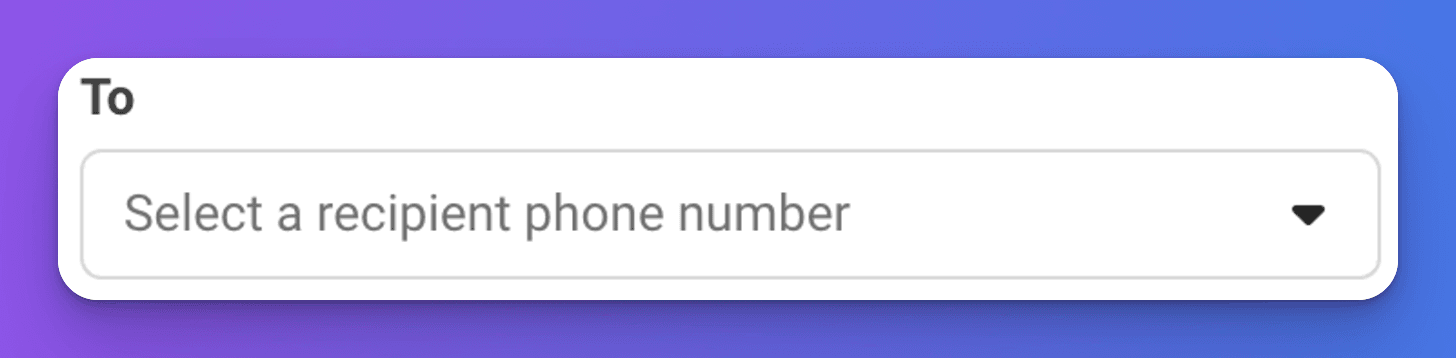
Go back to the API setup page and click the “To” field in the “Send and receive messages” section. Then, click “Manage phone number list”.
Add your phone number as a test number in the window that appears.
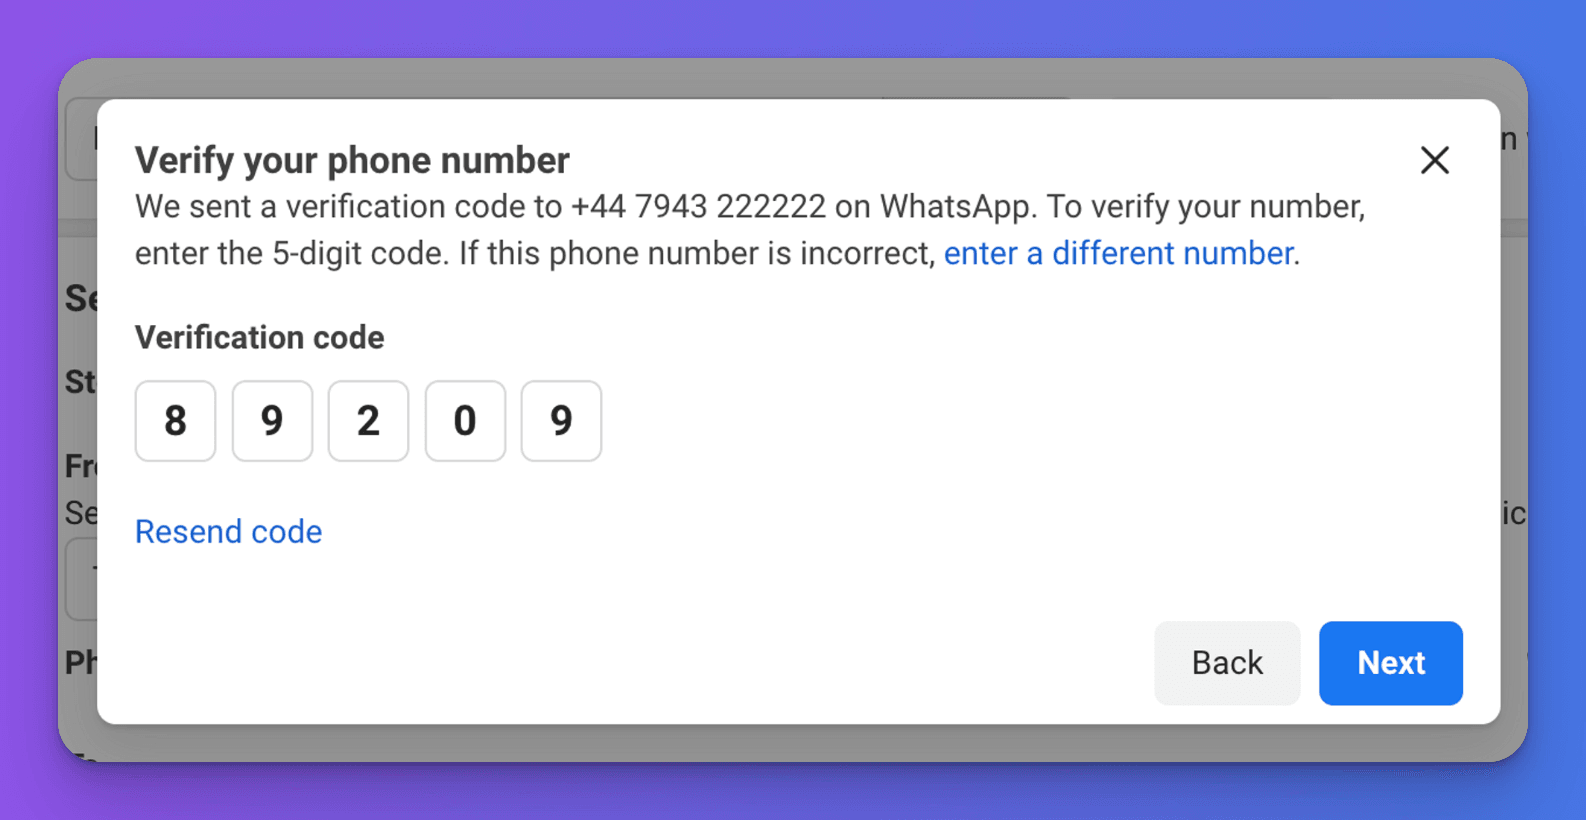
You will be sent a verification code on WhatsApp. Enter this code to confirm the number.

- In order to test your bot, simply send a message via WhatsApp to your business business test phone number from one of your configured recipient phone numbers & after a short delay your bot should respond to you. If it doesn’t, then it’s most likely a configuration issue, so please double check all the settings are correct + that your access token hasn’t expired.
Additional steps required for production integrations
Before you can make your app live, you will need to do the following:
- you’ll need a business phone number
- you’ll need to generate a permanent access token (see below)
- you’ll need to complete business verification
- you’ll need to put your application live + complete all relevant policy steps for meta
Get a permanent access token
The access token you are currently using from the Meta dashboard expires in 24 hours. You will need a token that never expires if your bot is to work continuously.
Meta provides information on how to get a permanent token here: Get Started - WhatsApp Business Management API (facebook.com)
- Sign into the Meta business suite
- Locate your business account in the top-left dropdown menu and click its Settings (gear) icon.
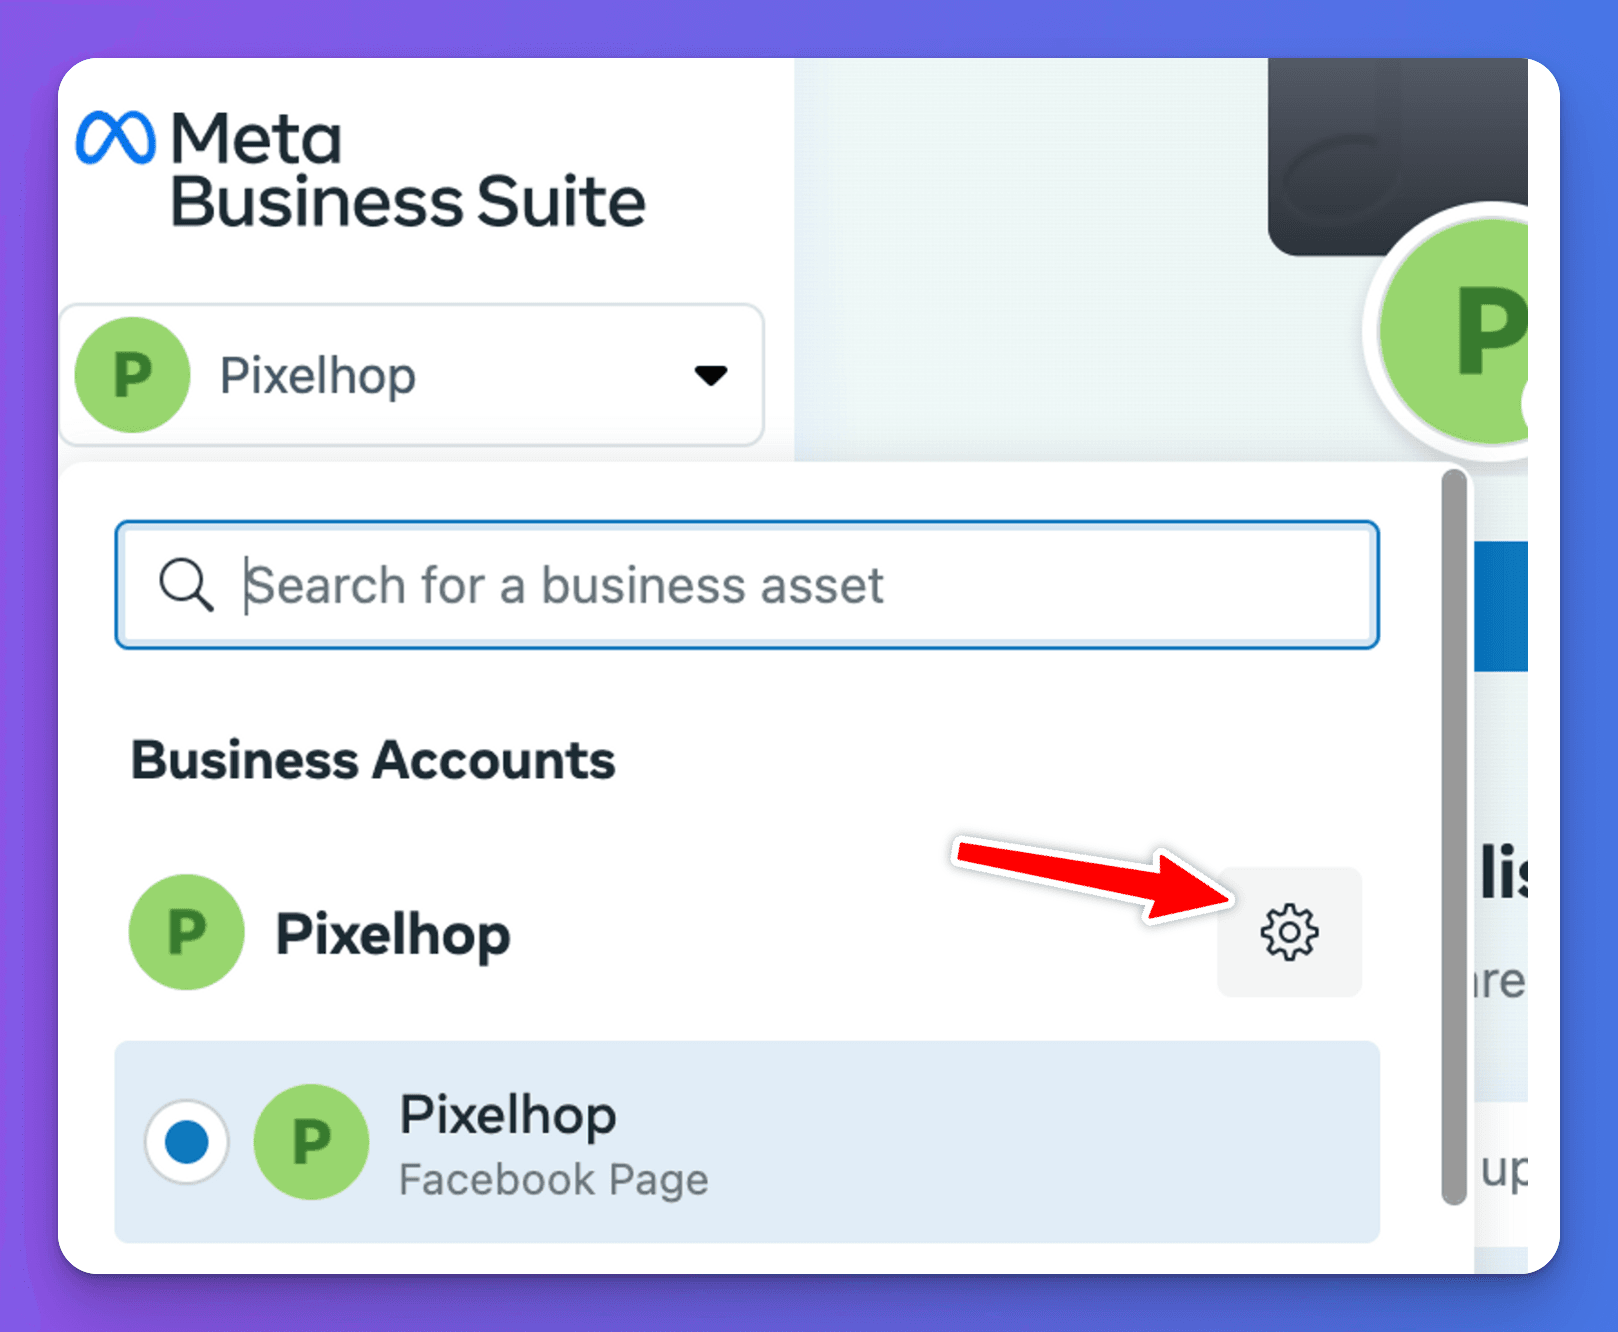
- Click Business settings.
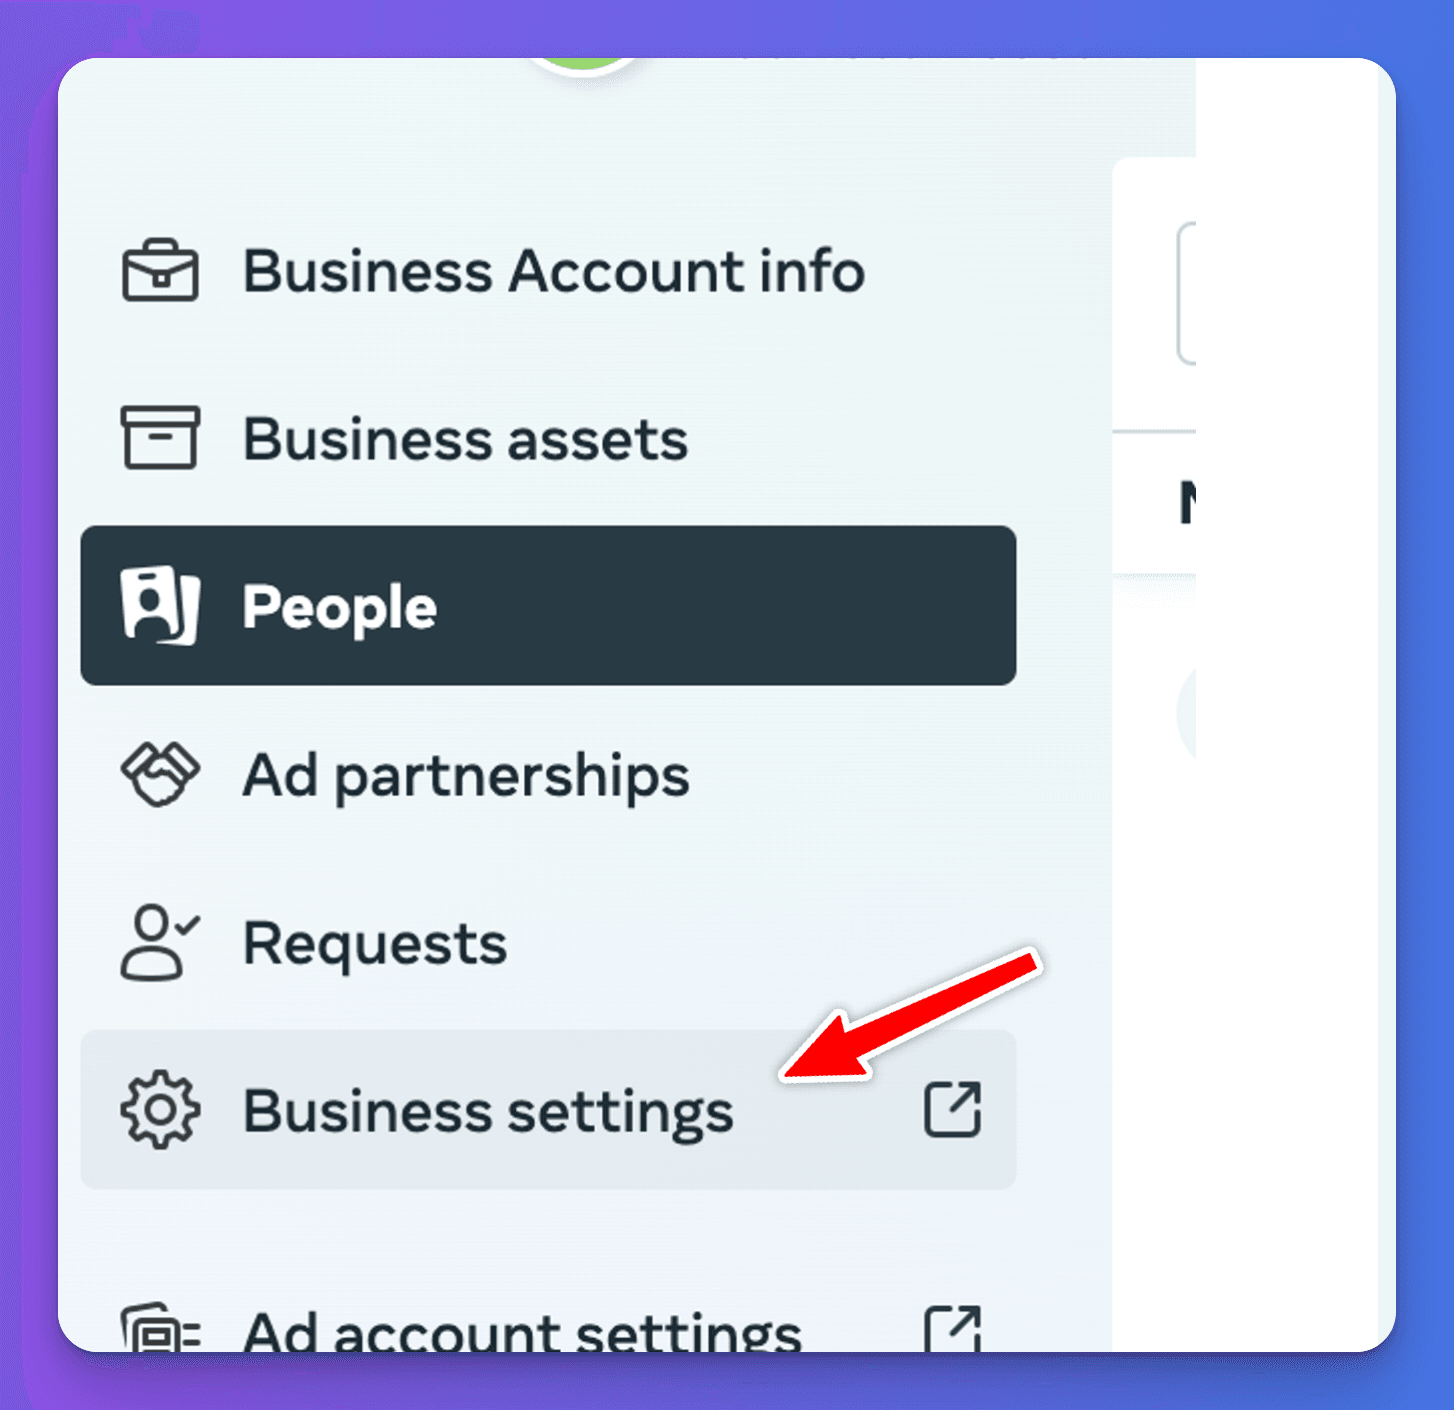
- Navigate to User > System users.
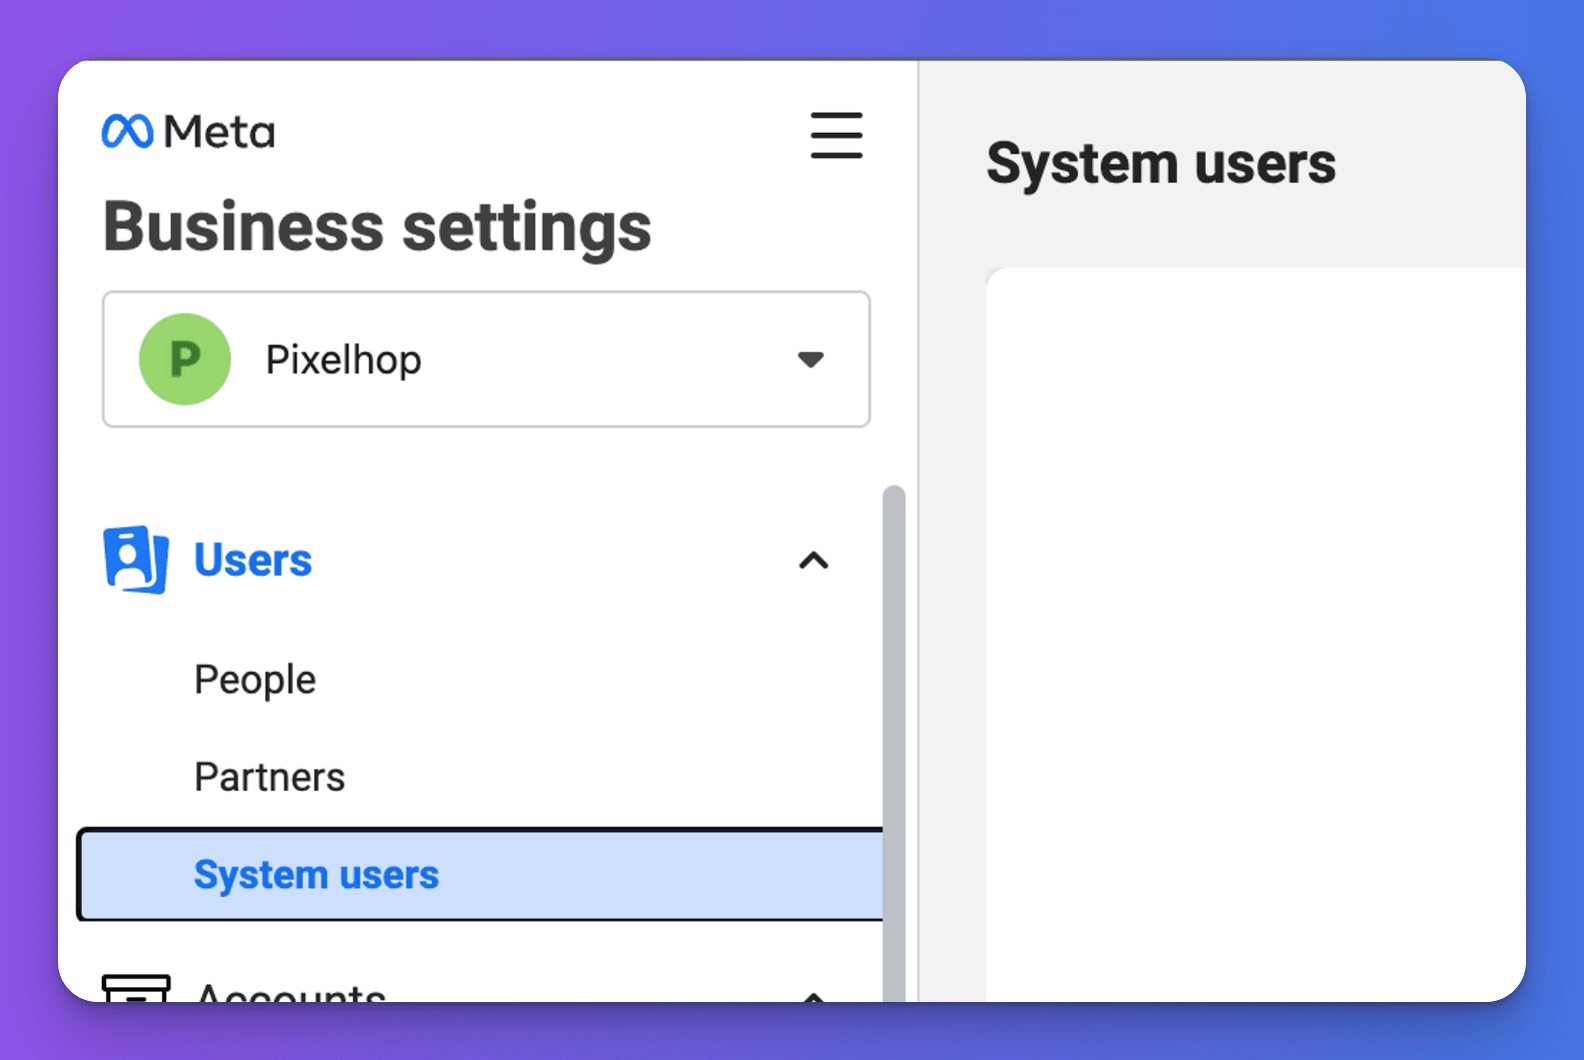
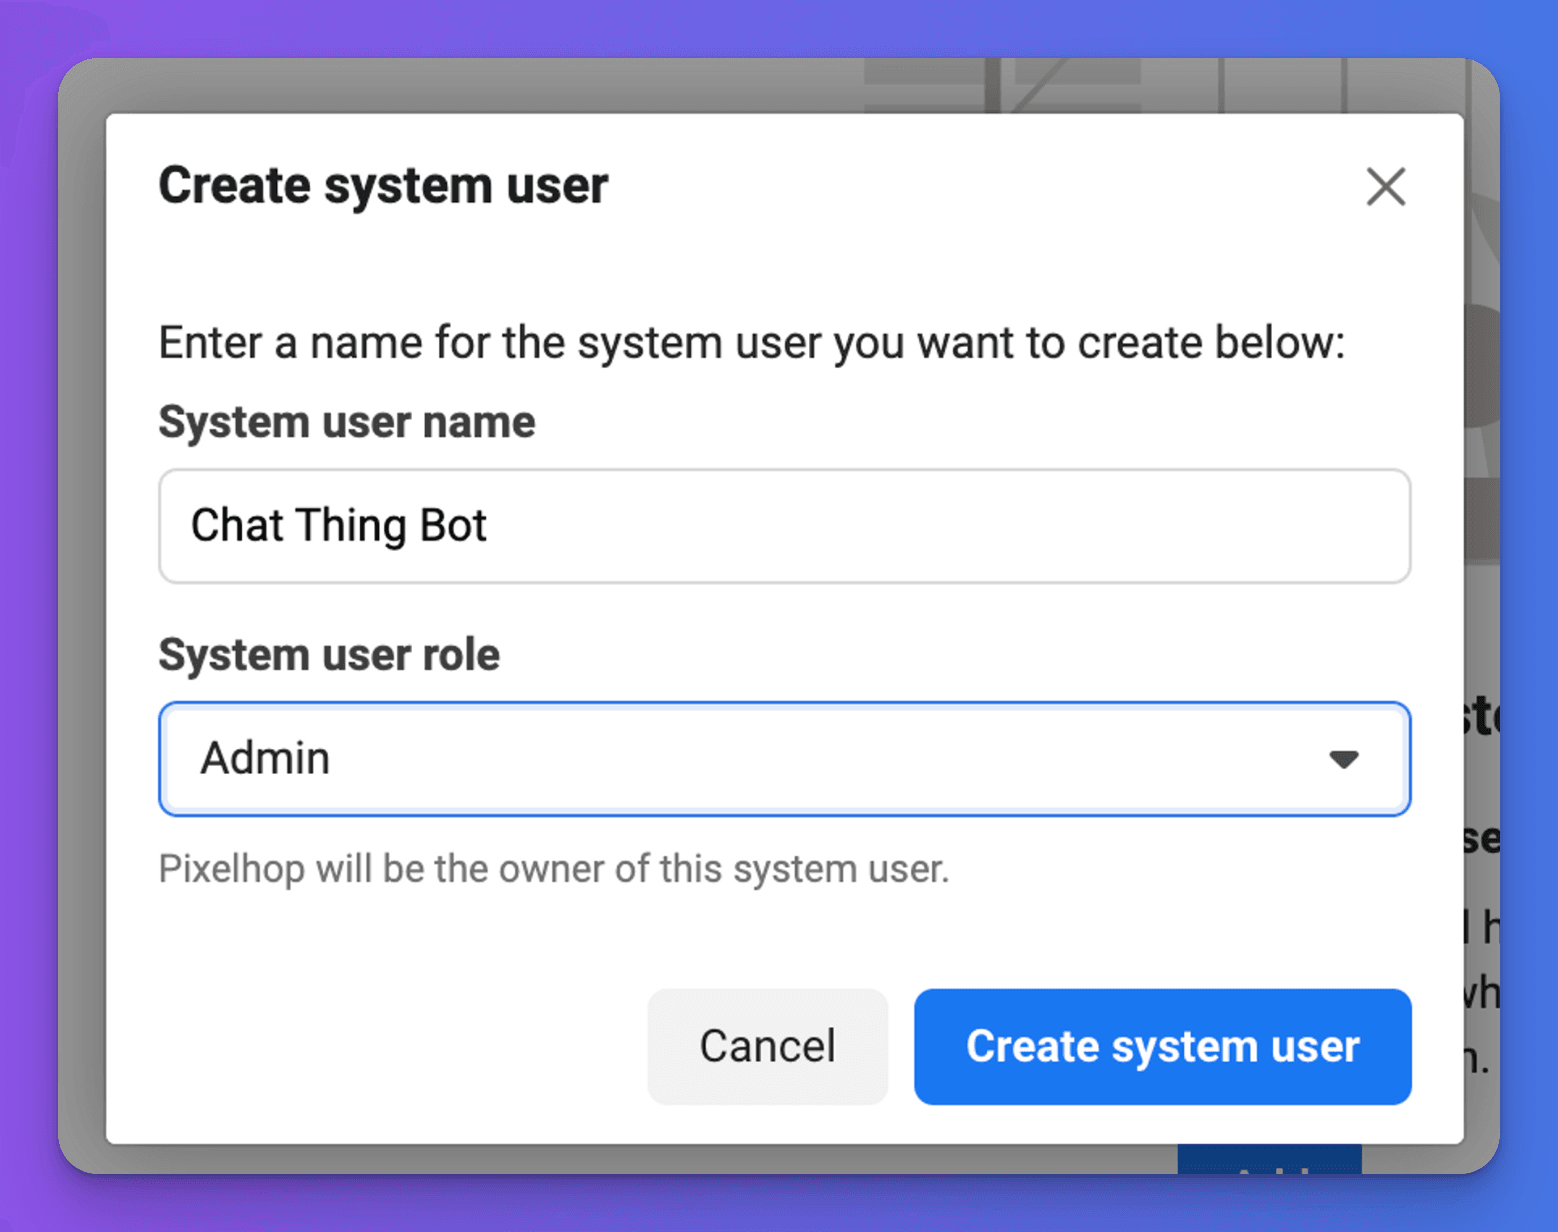
- If you don’t have a system user already you will need to create one. Click the “Add” button, and then in the window, give the user a name, and choose “Admin” from the “”System user role dropdown”
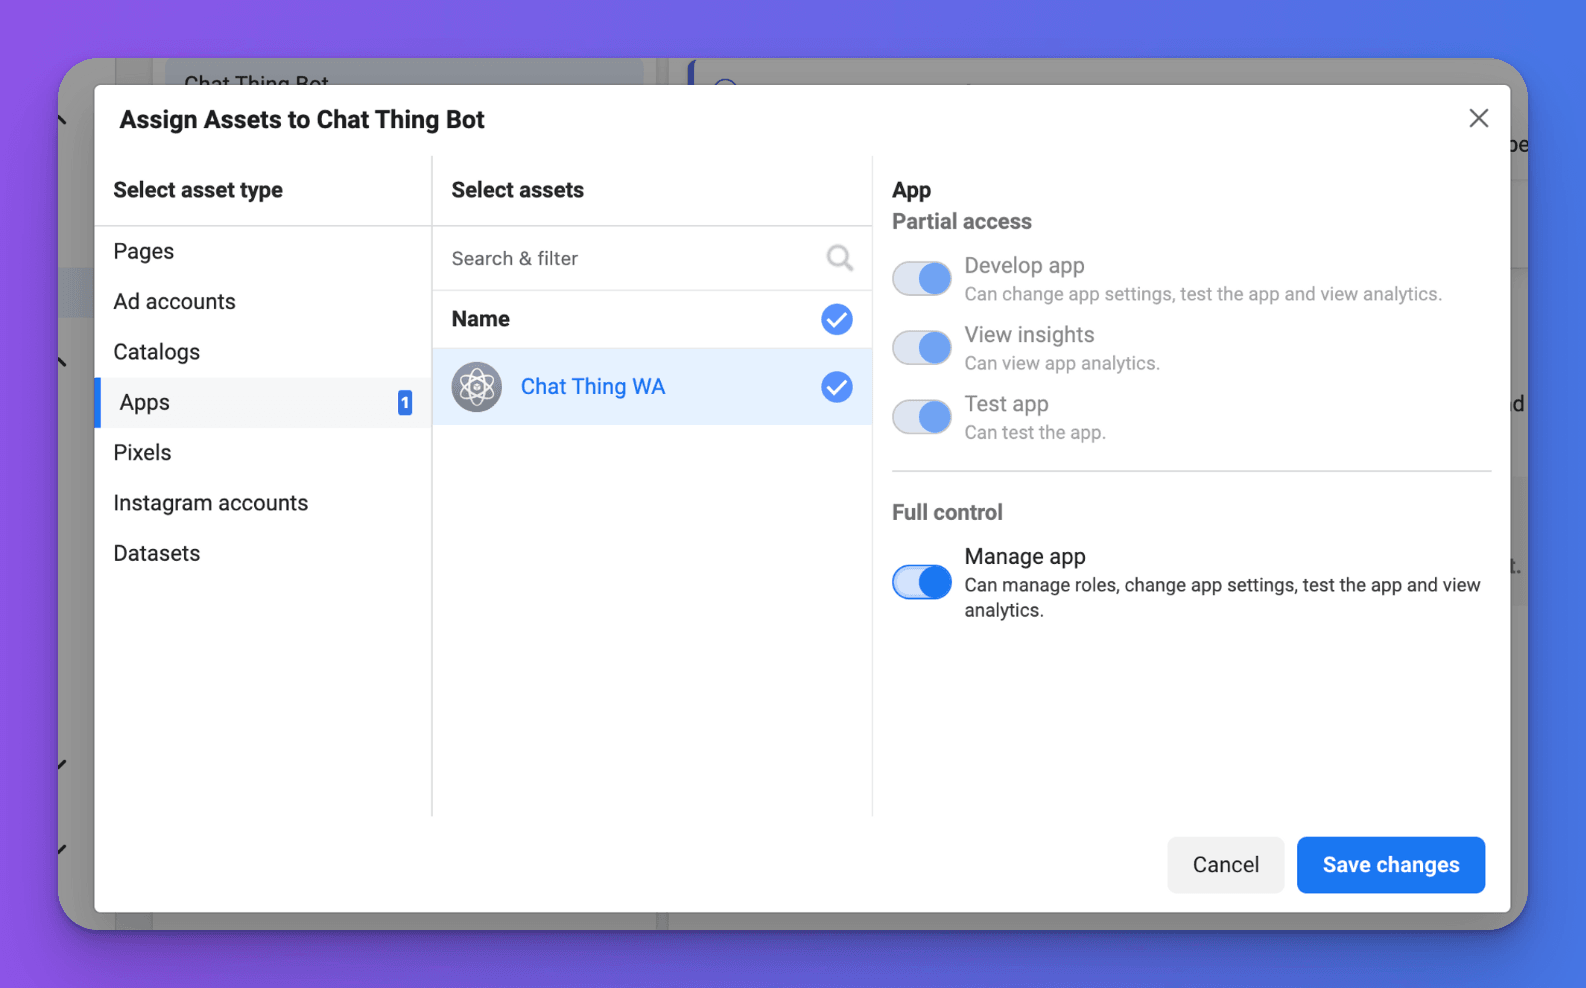
- We need to assign assets to the system user so that it has permission to manage your WhatsApp bot. Click the “Add assets” button.
Click “Apps” in the sidebar of the window that appears and select the app you have created for your WhatsApp bot.
Click the “Manage app” toggle in the Full control section.
Click “Save changes”
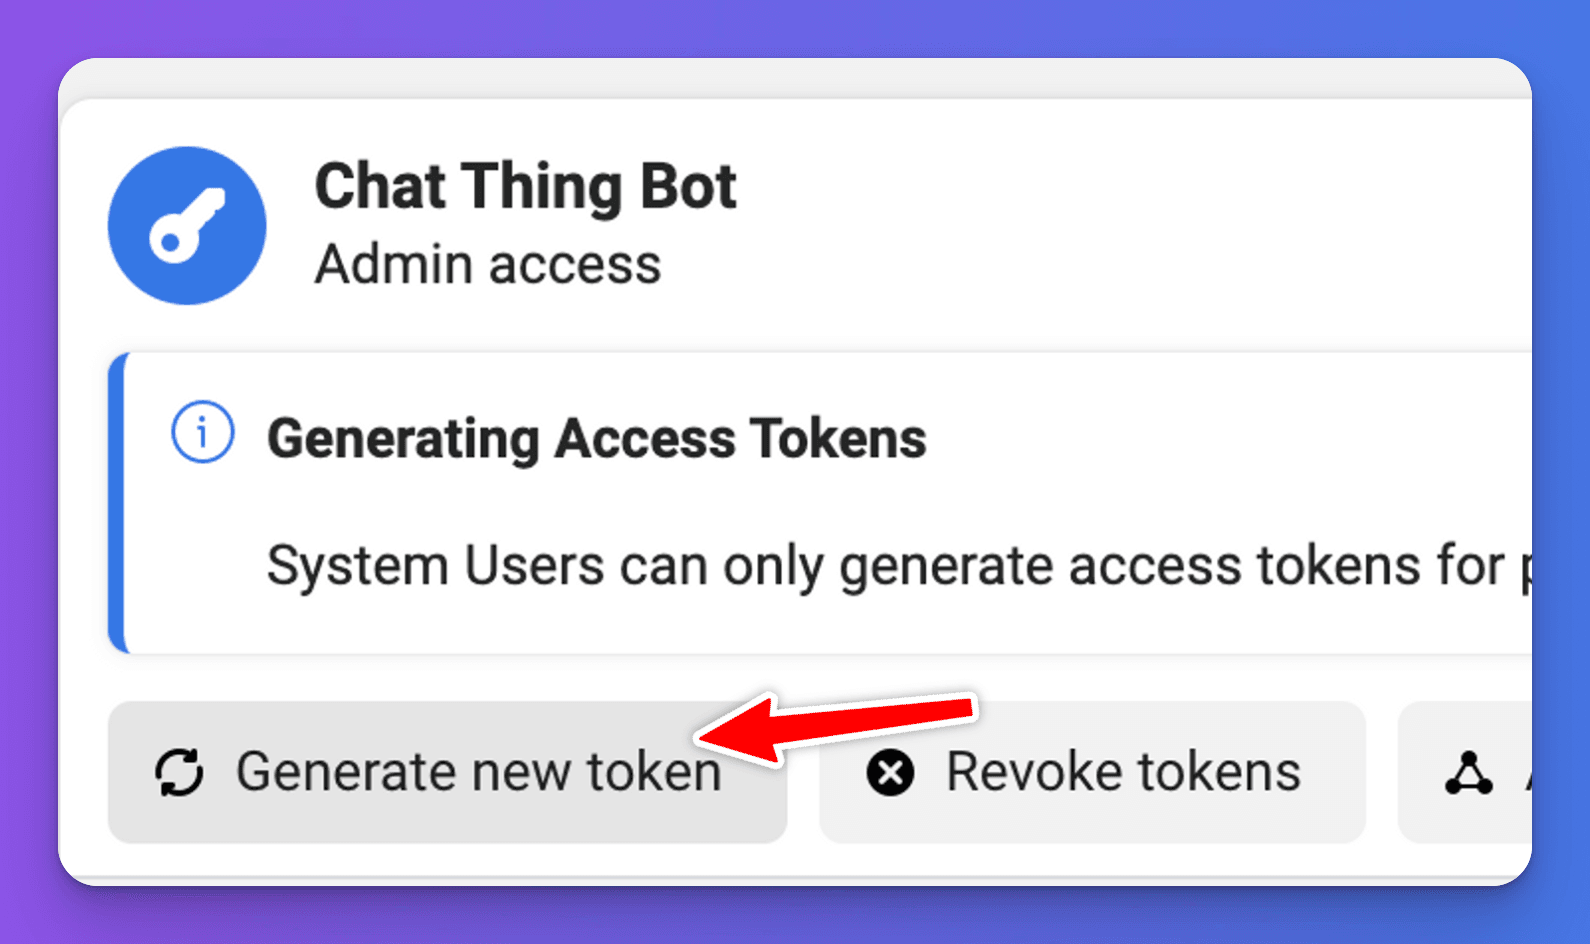
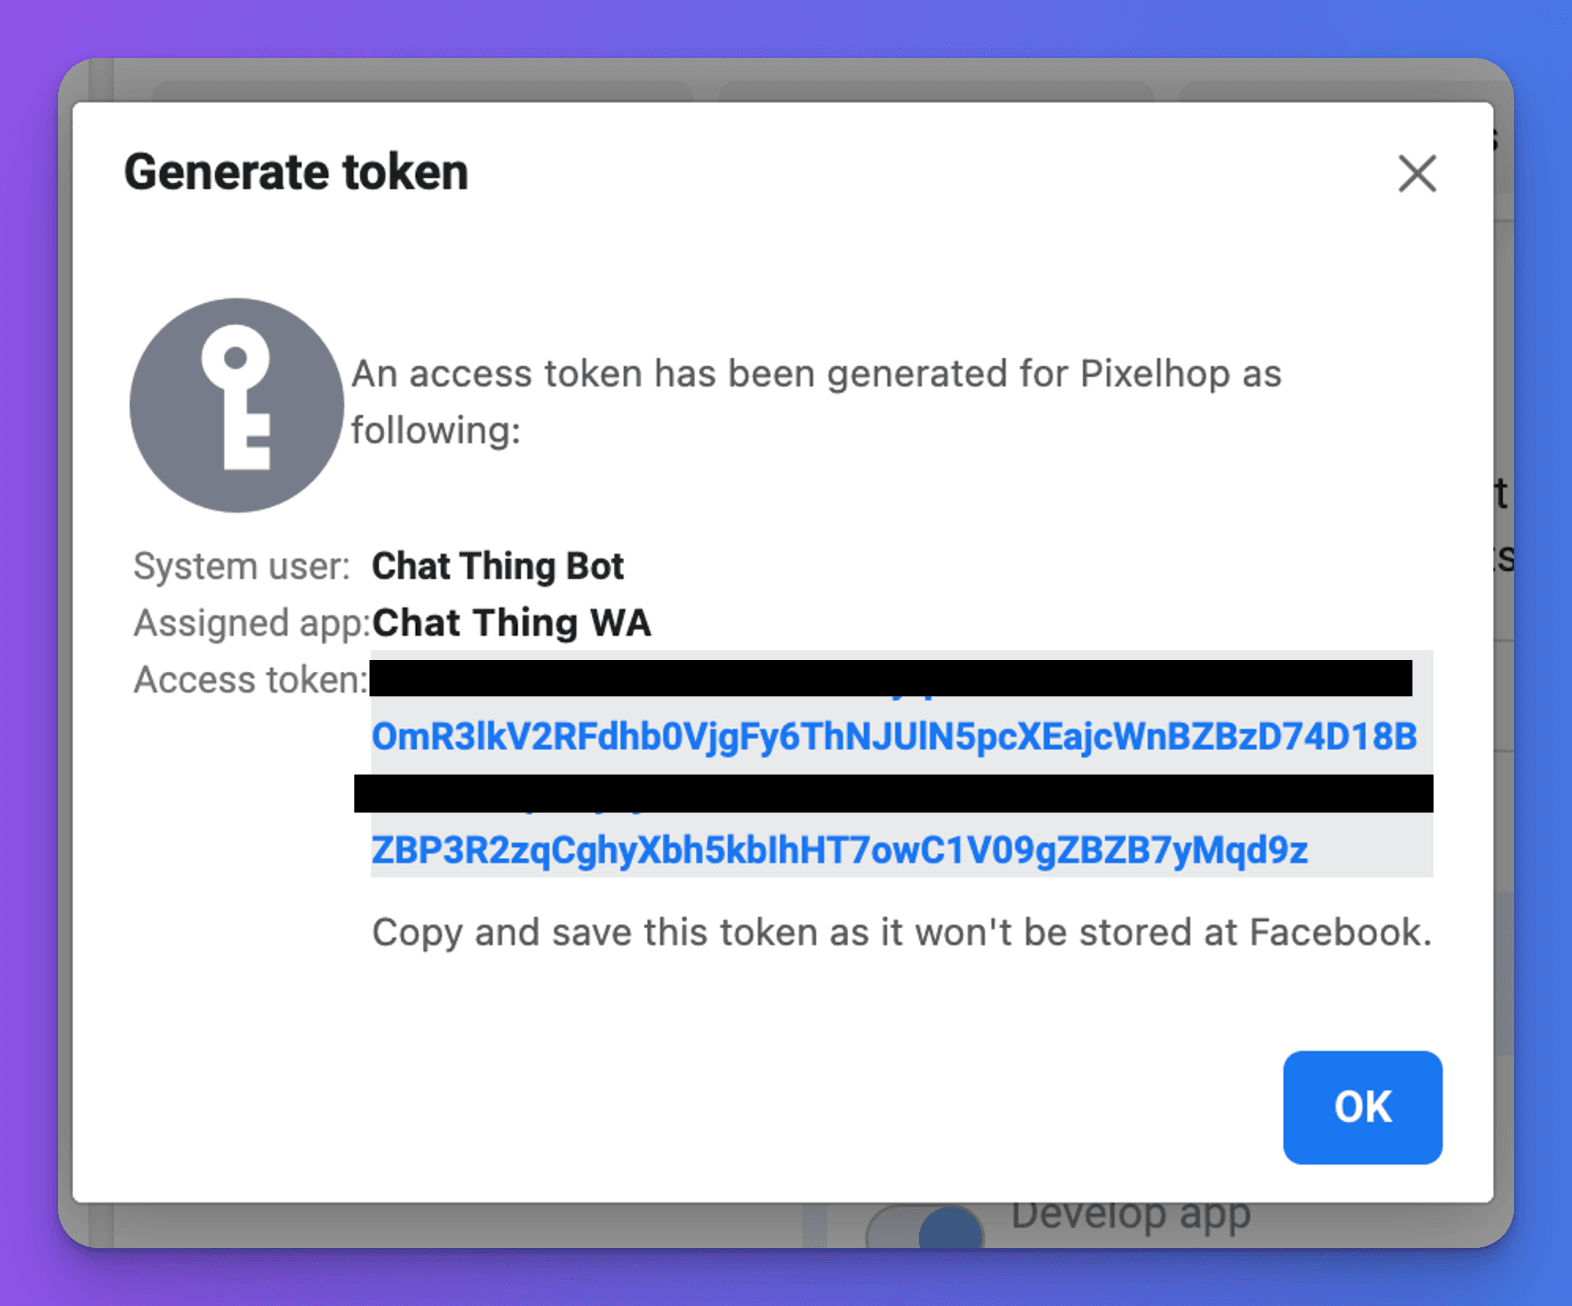
- Click the “Generate new token” button.
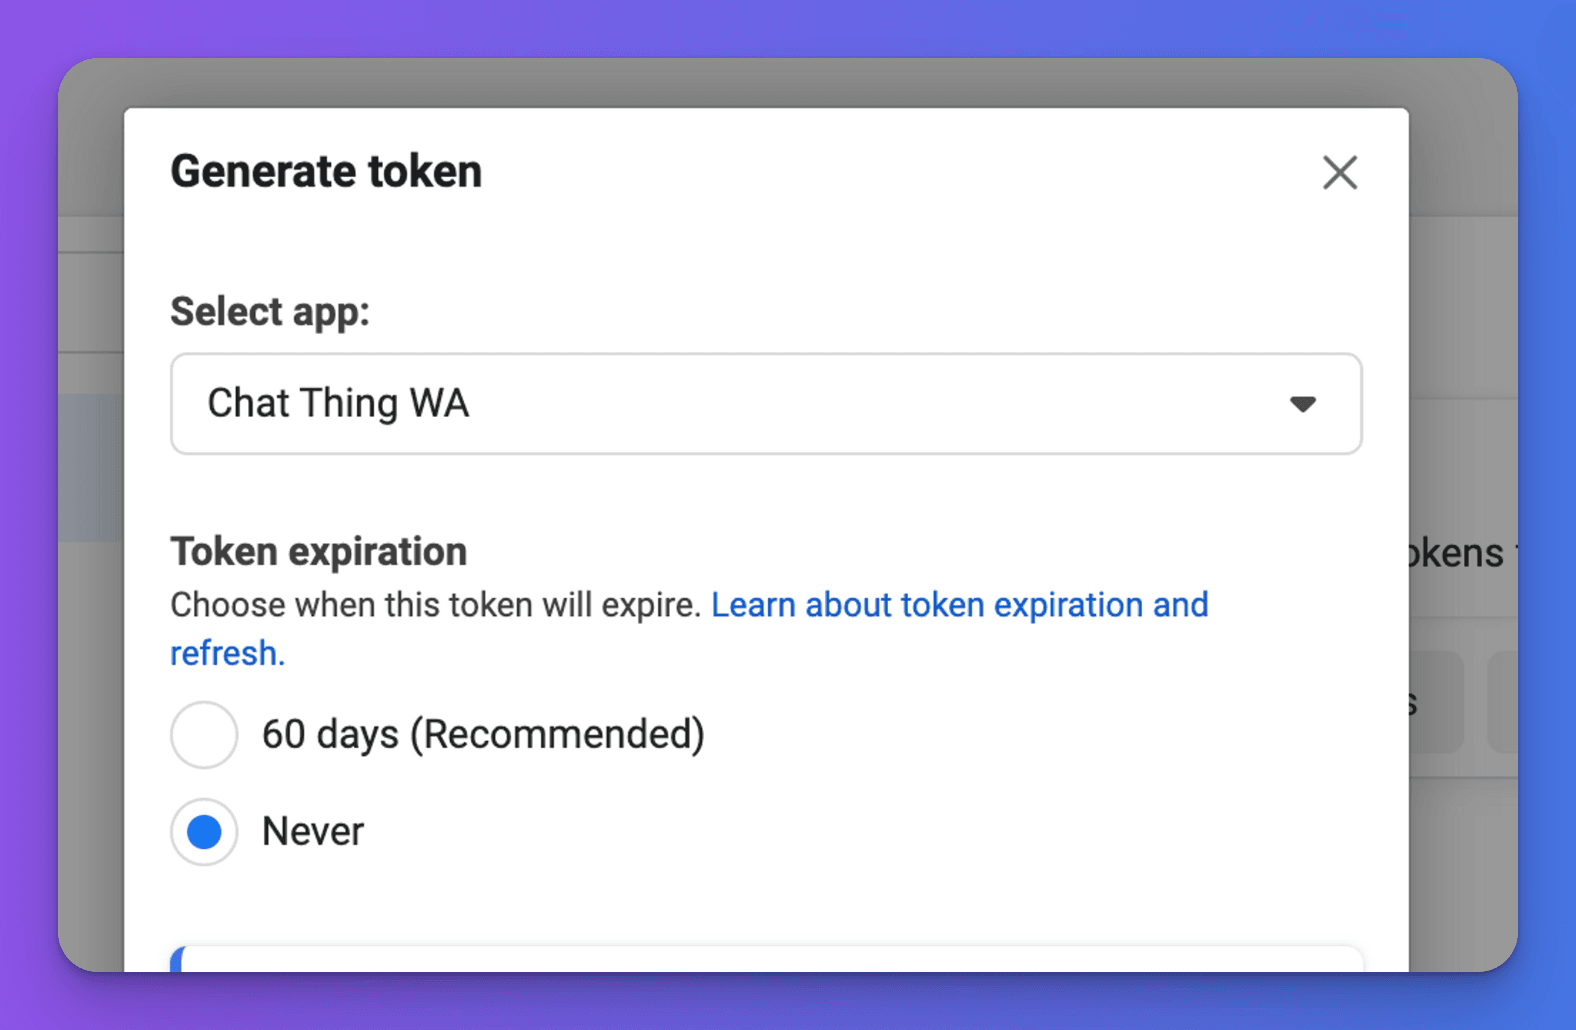
Select the WhatsApp bot app from the dropdown menu, and click “”Never” in the “Token expiration” section.
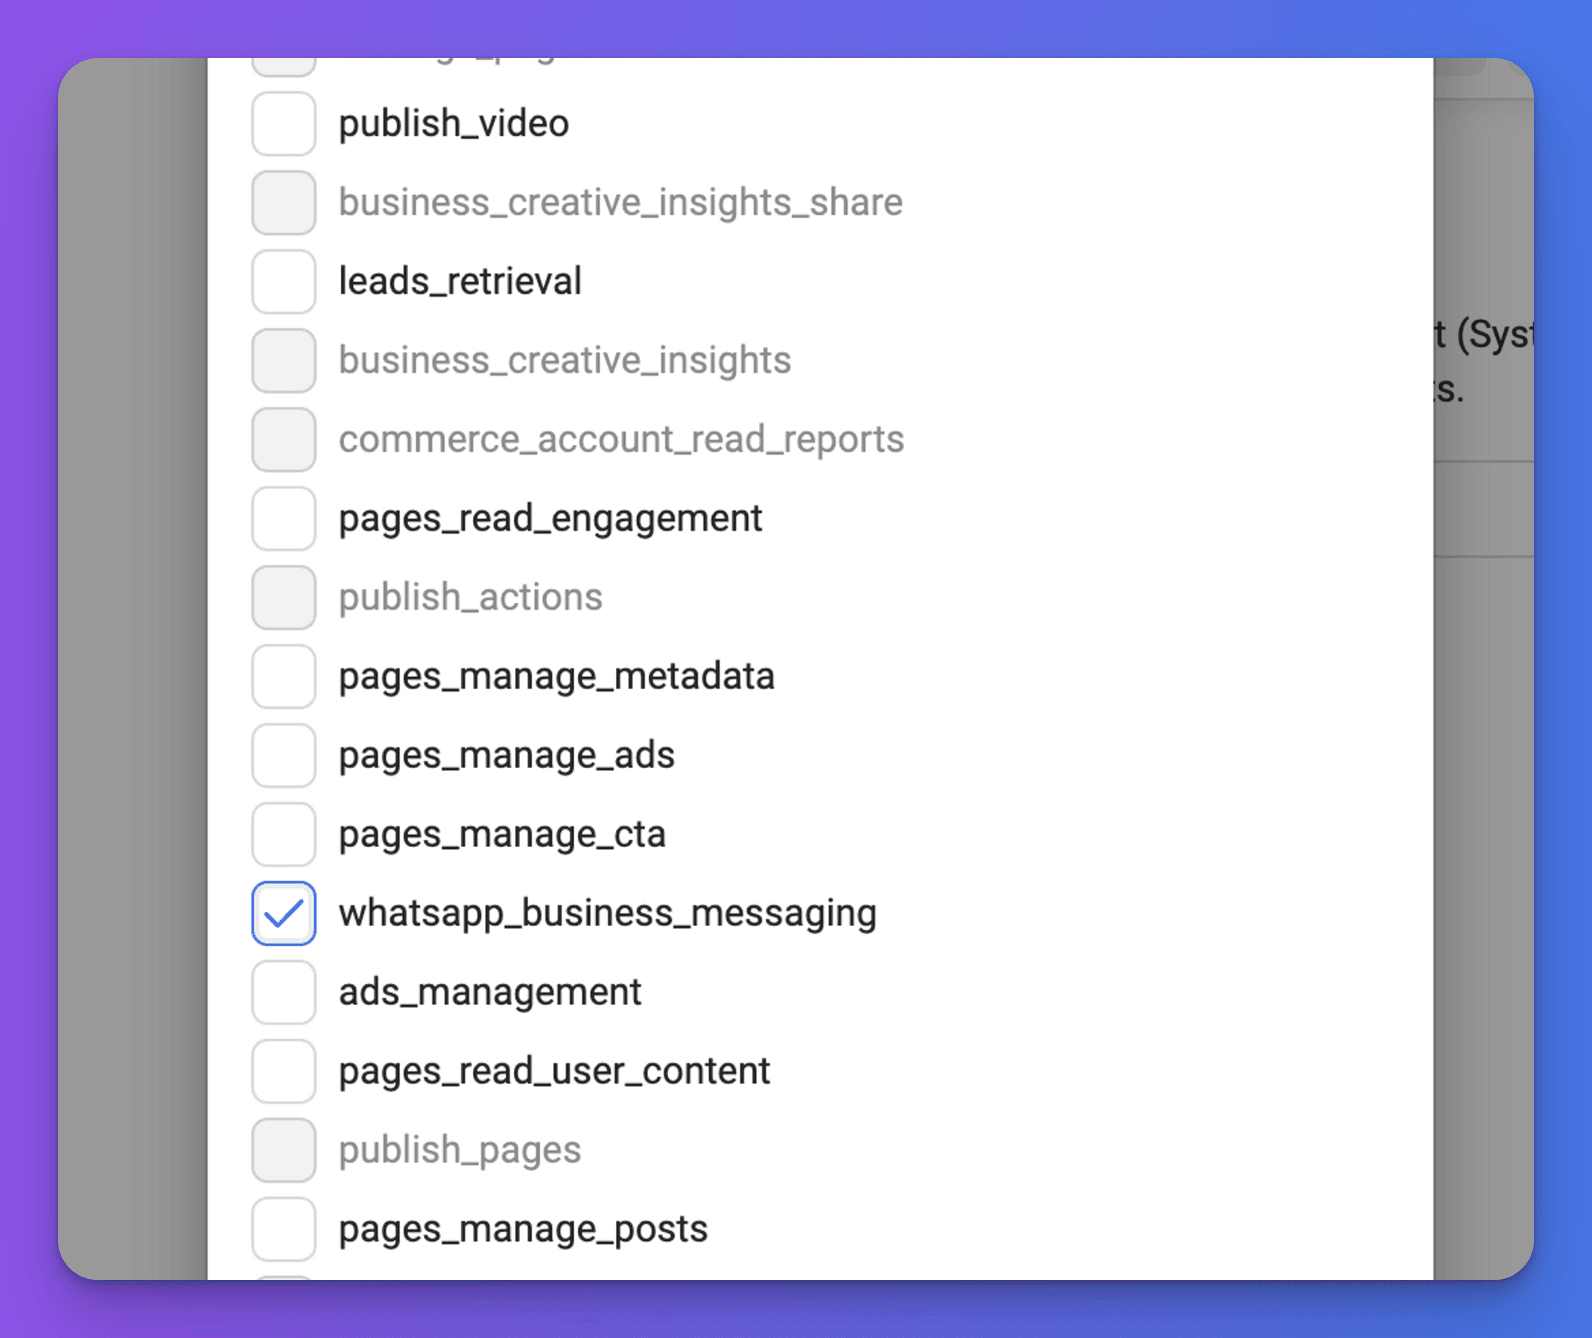
Finally, scroll down and select the “whatsapp_business_messaging” permission.
Click “Generate token”
- Copy the token that appears in the next window.
- Go back to the WhatsApp channel settings in Chat Thing, and replace the old temporary access token with the new permanent one, and click “Update settings”
We recommend you test your bot again in WhatsApp.
Troubleshooting steps
- Please be aware if you’ve used a temporary access token, this will only last for 24 hours so be sure to refresh this as required through development and upgrade to a permanent access token when you are ready + before releasing your bot.