Bots
Bot advanced settings
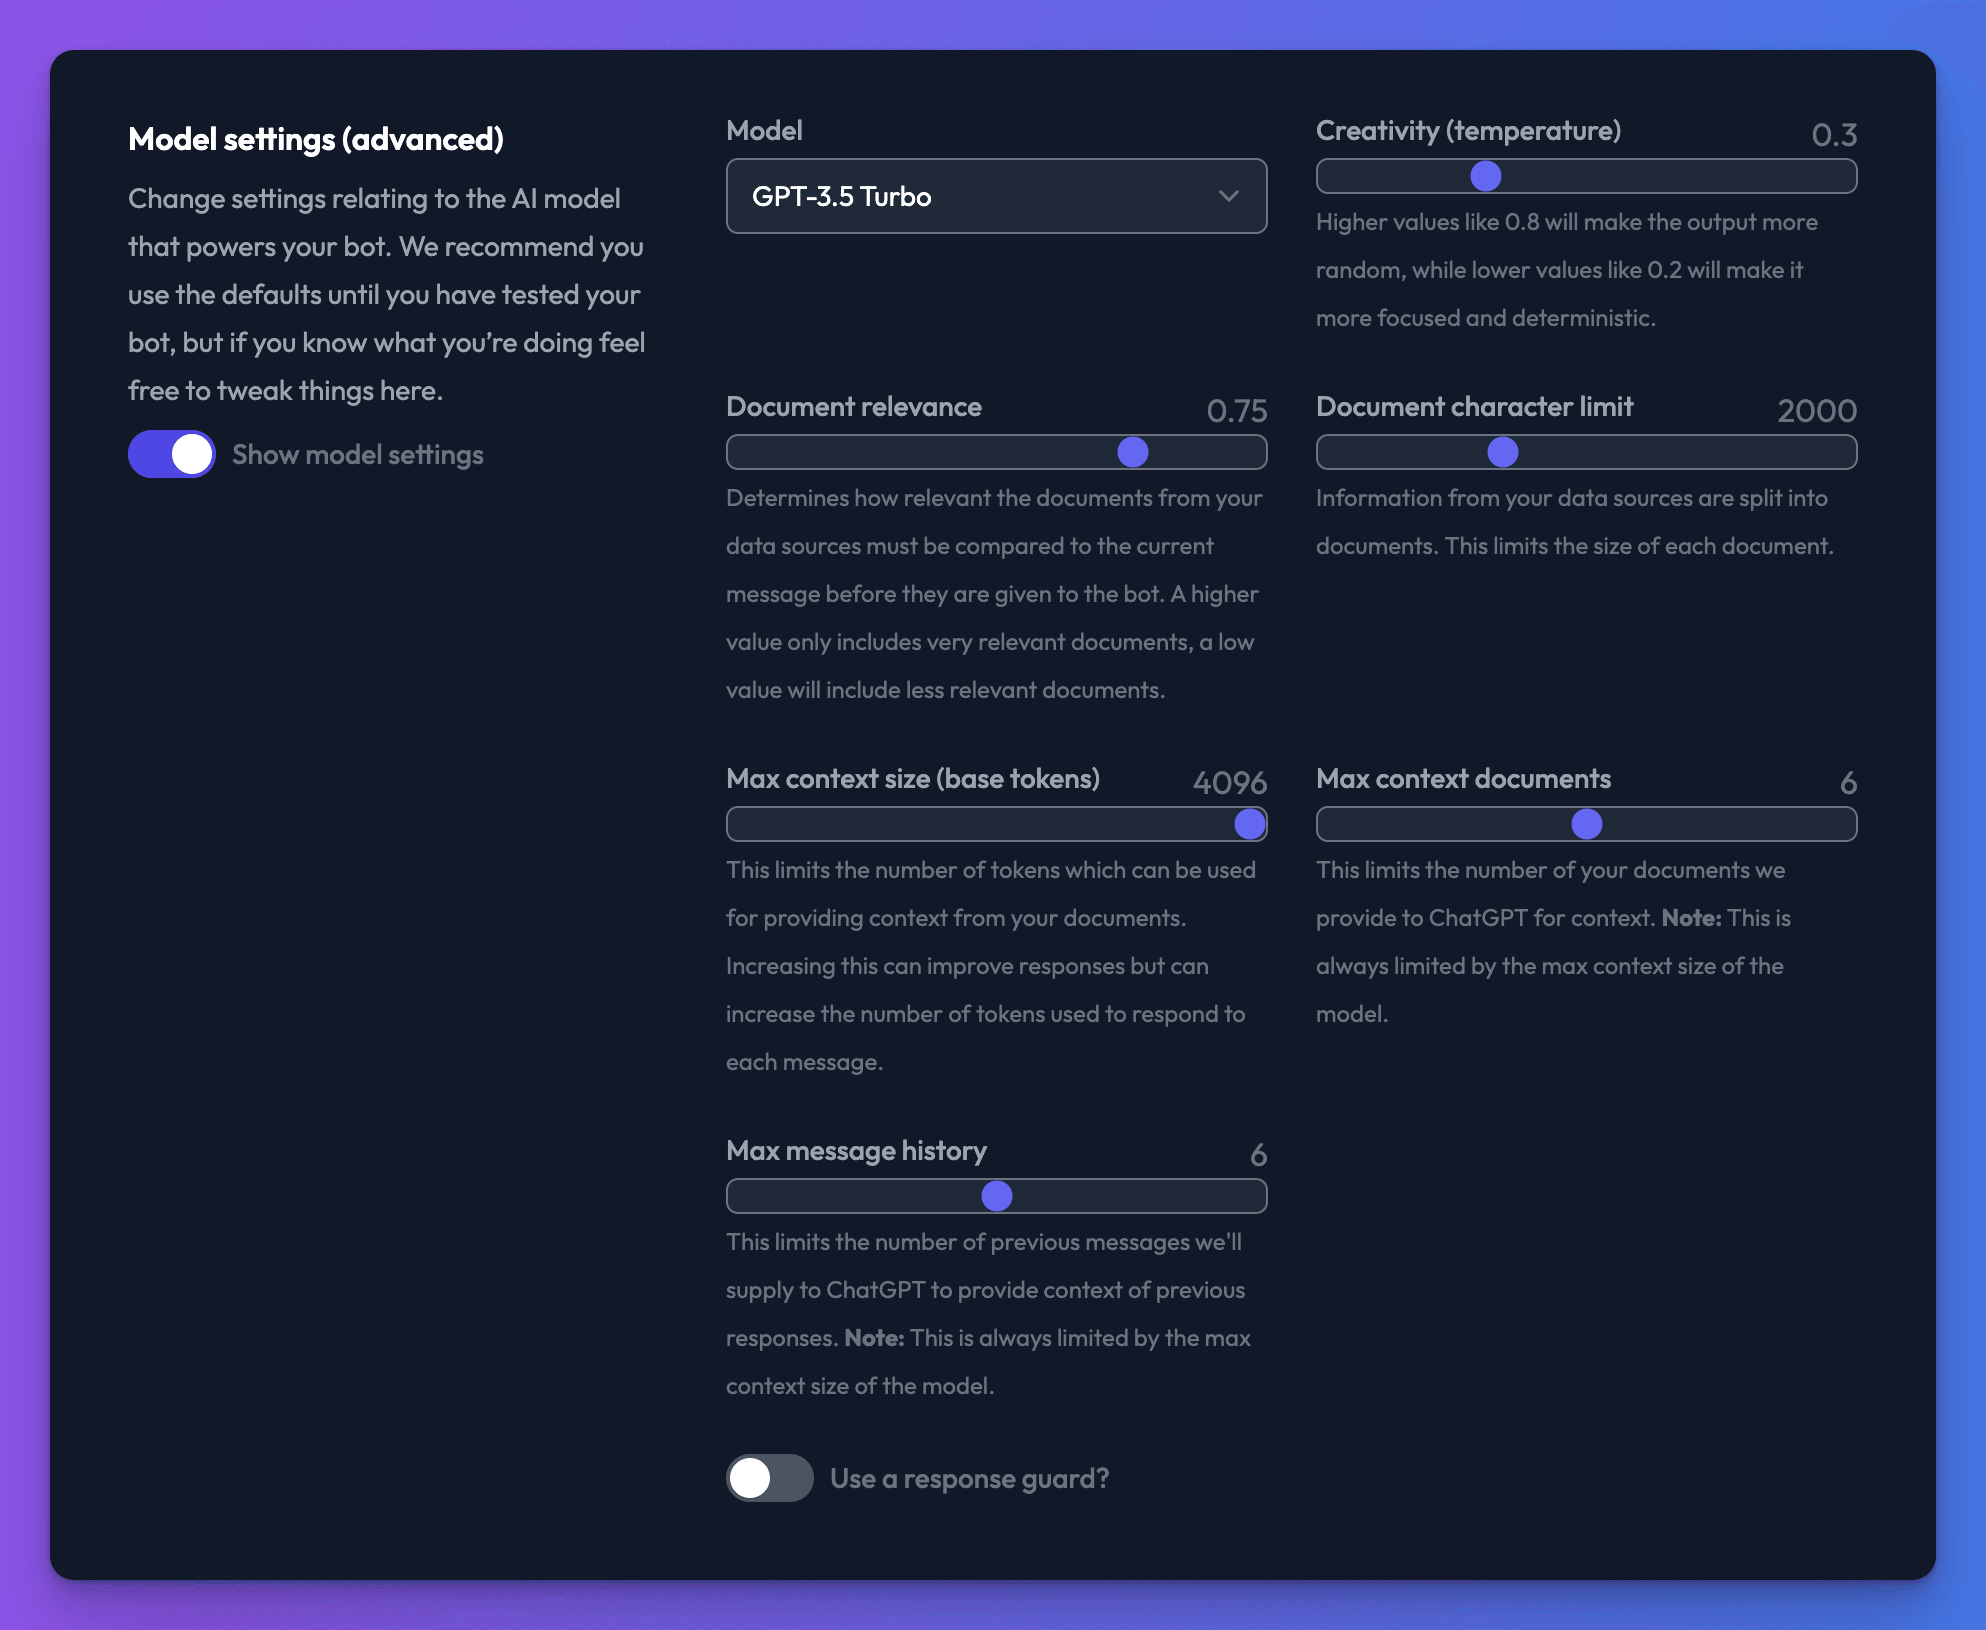
Your bot advanced settings let you tweak and adjust your bot and the underlying AI model that powers it.
Where are my bot advanced settings?
To access your bot advanced settings, go to the bot dashboard, navigate to the “General settings” tab, then open the “Model settings (advanced)” area beneath the general settings.
Choosing the bot model (GTP-3/GPT-4)
Only available on some plans
Model selection is only available to Standard or above subscribers.
You can switch the underlying AI model your bot uses by using the model drop down in the advanced settings section.
For more information about the available AI models read here: Available models
Adjusting your bots creativity (temperature)
Use the creativity slider to adjust how creative your bot is when answering questions. Use a low value if you want your bot to:
- Answer the same question the same way each time
- Be less likely to make things up
- Be more likely to quote your data sources word for word
- Be more likely to follow your prompt strictly
Use a high value if you want your bot to be more creative and do the following:
- Answer the same question with more variations each time it is asked
- Fill in gaps in the knowledge provided by your data sources
- Be more likely to make things up
Adjusting the document relevance slider
When you ask your bot a question, we load up relevant parts of your data sources for the bot to use within its answers. By default, we only give the bot data we think is very relevant to your query, but adjusting this slider allows you to choose how relevant your data should be before giving it to the bot.
If your bot is struggling to answer questions about your data sources, try a lower document relevance value to see if that helps. Likewise, if you think your bot is answering questions it shouldn’t be, try increasing the document relevance.
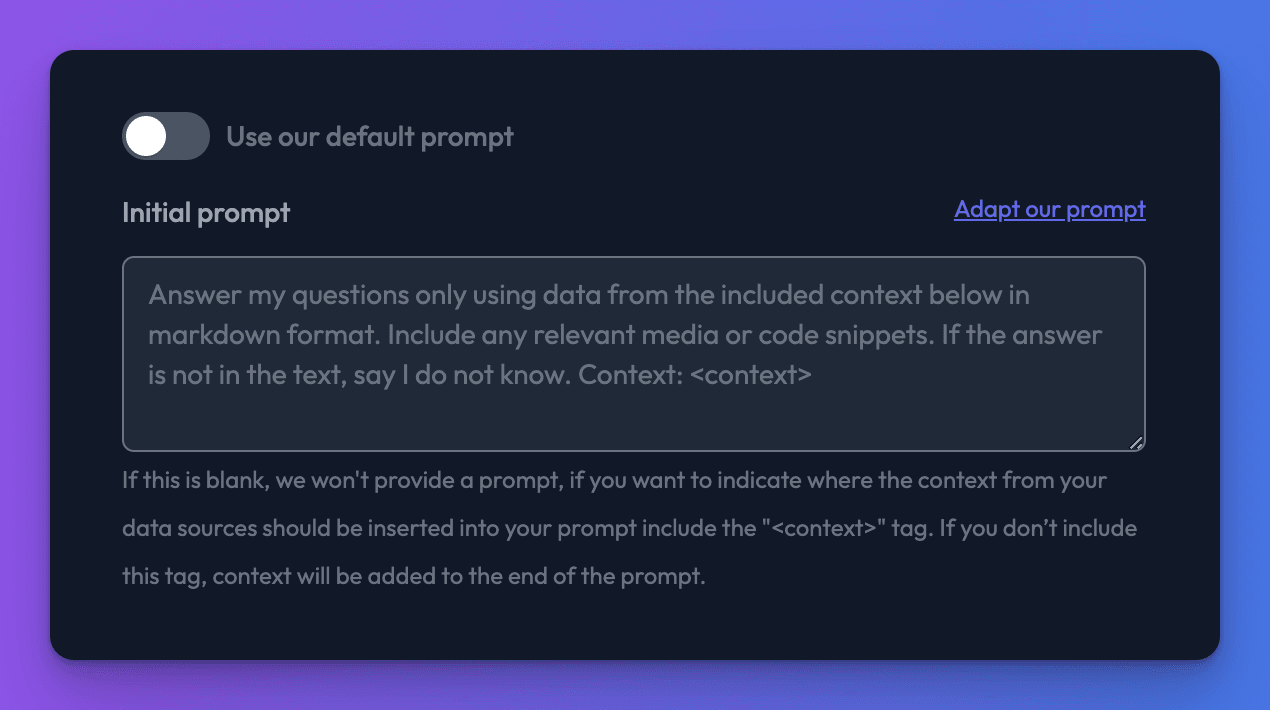
Customising the bot prompt
The prompt is the instructions given to your bot that tells it how it should act and how it should answer questions. By changing the prompt, you can get your bot to behave very differently. This is the default prompt we provide to your bot:
Answer my questions only using data from the included context below in markdown format. Include any relevant media or code snippets. If the answer is not in the text, say I do not know.
You can change this using the “Use our default prompt” toggle in the bot general settings
Changing your bots tone
You can use the prompt to easily change your bots tone. For example, you could say:
Answer my questions using the data included in the style of a pirate of the high seas.
Or
Answer my questions using the data included in the style Donald Trump.
An example prompt template
The prompt is a very powerful tool in tailoring how you want your bot to behave and respond. Firstly, we want to stress that there are many great resources online to help with getting the most out of your prompt. However, to get you started and to pass on a structure which has worked quite well, we've included an example template below. Some general guidelines as to what each part should contain and examples for each. Please do tailor these to your particular use case and remember this prompt is provided with each query, so the longer it is, the more tokens will be used per query.
Start by describing how you want the bot to behave, its personality, its role & what it is intended for.
You are a helpful assistant, please respond in a friendly yet professional manner.
System message
You can provide a shorter version of this in the system message too. From our example: 'You are a helpful assistant' is probably a good example of what you could choose to include for the system message.
Next, make it clear what kind of information it will be receiving. Specifying Markdown as the input allows us to include images, links, and other structures from your data sources to help your bot respond to users.
You will be given information to help answer this question in markdown format.
Then we explain Chat GPT should reference information identified within your data sources to help its responses. The <context> marker is very important, this is where relevant parts of your data source will be included automatically. If you don't include this marker, the context from your data sources will be added after your prompt.
Please answer questions using the following context only: <context>
Finally, we list important considerations or restrictions. Asking the bot to respond using markdown allows it to include images/links from your data sources.
Rules:
- If the answer isn't clear from the provided context above, please say "I don't know"
- Please don't mention phrases like "the text mentions", "according to the context"
- Your answers should be short and concise
- Please respond using markdown format
Putting it all together
You are a helpful assistant, please respond in a friendly yet professional manner.
You will be given information to help answer this question in markdown format.
Please answer questions using the following context only: <context>
Rules:
- If the answer isn't clear from the provided context above, please say "I don't know"
- Please don't mention phrases like "the text mentions", "according to the context"
- Your answers should be short and concise
- Please respond using markdown format
Changing the max context size
Each model has a different context size, this is the maximum number of tokens we can send to ChatGPT to respond to a user's request. Reducing this will reduce the maximum number of tokens each request can use, but it also limits the amount of information we can include from your data sources.
Changing max context documents
When you upload data to Chat Thing, the information is broken down into chunks, we refer to these as documents. You can use this slider to control the maximum number of documents we provide to Chat GPT along with each request. Reducing this will limit the number of documents provided, which can help reduce the number of tokens used for each request.
Changing max message history
This slider allows you to control the number of previous messages (including user queries and bot responses) provided to Chat GPT. Decreasing the value will limit the amount of previous messages provided, which can help reduce the number of tokens used for each request.