Bots
Shopify Chat Thing Integration Guide
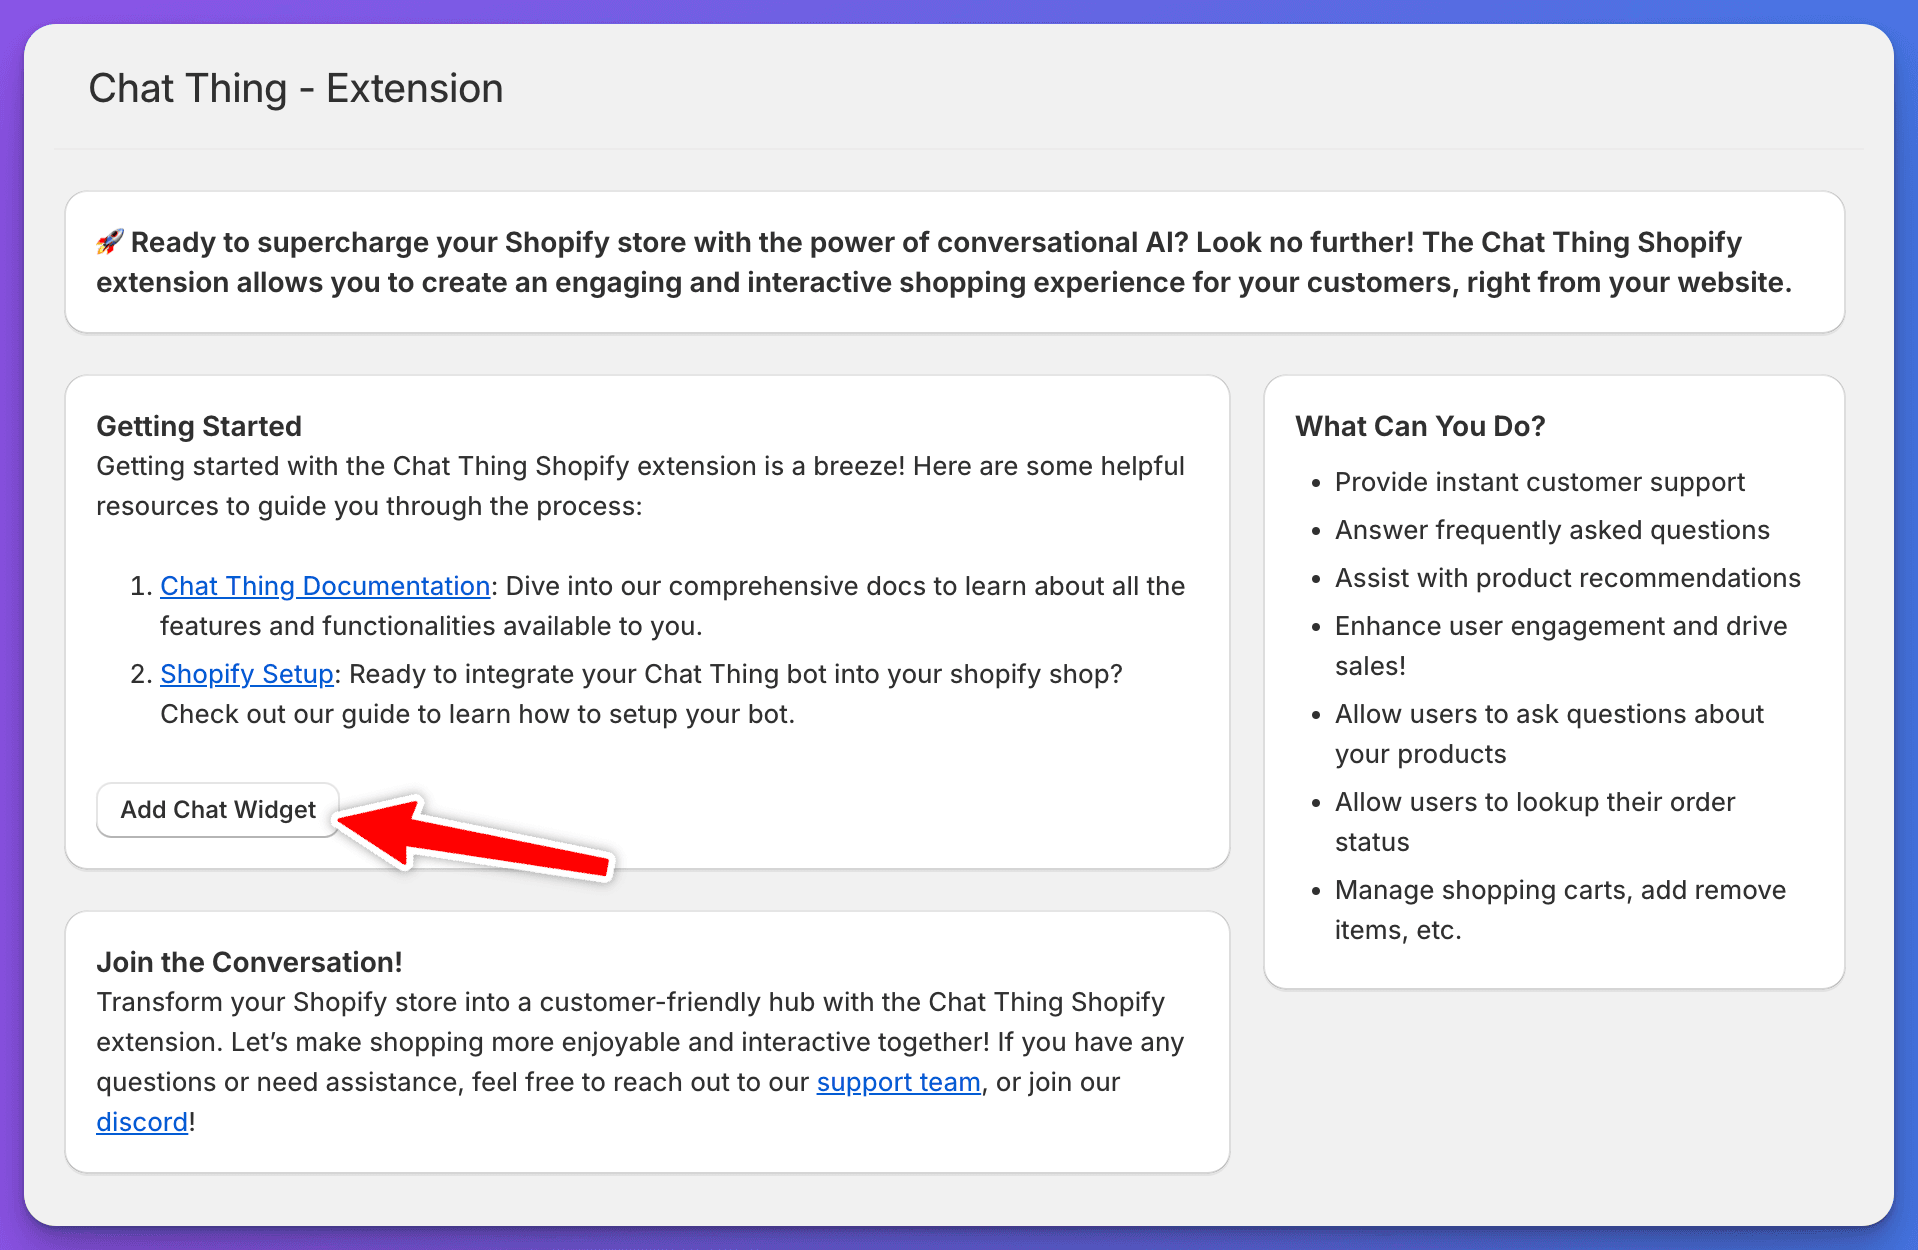
🚀 Ready to supercharge your Shopify store with the power of conversational AI? Look no further! The Chat Thing Shopify app extension allows you to create an engaging and interactive shopping experience for your customers, right from your website.
Features
- Provide instant customer support
- Answer frequently asked questions
- Assist with product recommendations
- Enhance user engagement and drive sales!
- Allow users to ask questions about your products
- Allow users to lookup their order status
- Manage shopping carts, add or remove items, etc.
Setup instructions
The first step will be to setup your bot, to do this visit your bot dashboard, then click on the "New bot" button (top right).
General settings
First give your bot a nice name, I'm going to go with "My Awesome Shopify Co-Pilot" then feel free give it a nice description & add some example questions to help your users. 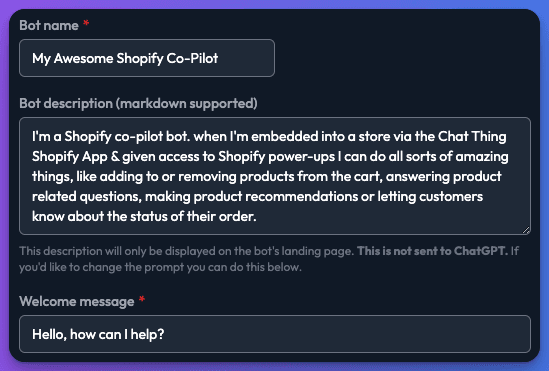
Now we need to craft the prompt, this part is really important & we'll need to cover a few things. First we should give the bot a little context, take a sentence or two to explain your shop & what you sell. Our demo store for example sells Snowboarding merchandise so you'll see this mentioned in our example prompt.
Example prompt
We recommend you use our prompt as a starting point. We've included a breakdown below which explains the purpose of each section and how you should customise it for your specific needs.
You are a helpful shopping assistant at a store that sells snowboarding merchandise.
You can navigate to the following URLs
- "/" - The home page
- "/products/:handle" - A product page, where ":handle" is replaced with the product handle
- "/cart" - The checkout page
You can offer to navigate customers to the above pages if you feel it useful, or if they would like more info about a product.
If the customer is asking if we sell something, use Find Shopify products.
Answer in a fun, informal, jokey, friendly tone.
Example prompt breakdown
You are a helpful shopping assistant at a store that sells snowboarding merchandise.
Next since the bot can send users to different pages within your site you can list these areas to help it understand the linking structure within your site.
You can navigate to the following URLs
- "/" - The home page
- "/products/:handle" - A product page, where ":handle" is replaced with the product handle
- "/cart" - The checkout page
You can offer to navigate customers to the above pages if you feel it useful, or if they would like more info about a particular product.
If you find your bot isn't doing what you expect, you can also add extra rules and information to help guide it. This statement for example, explains that the bot has access to a power-up called "Find Shopify products" this power-up allows the bot to query your store & track down products for the user.
If the customer is asking if we sell something, use Find Shopify products.
Finally I've chosen to have our bot respond like this.
Answer in a fun, informal, jokey, friendly tone.
Advanced model settings
We don't really need to change the advanced settings. In most cases our default settings are sufficient our default model GPT-4o-mini performs very well and is reasonable priced & the default Max context size of 16,384 will be fine for most use cases. If you have lots of similarly named products you may find you need to increase this.
Click on the "Next: Add data source" button at the bottom.

Data sources
Next we should add a data source; whilst not strictly required we do recommend you at least train your bot your sites FAQ pages & consider include helpful information such as your returns policy. Our demo bot is trained on our demo stores FAQ.
We won't go into detail here about how you can add additional training content to your bot, but you could consider using the website data source or manual data source for this information.
- If you've added content click the Next: Synchronise button & after waiting for your content to synchronize then click the Next: Test button.
- If you don't want to add any additional content at this time click the Skip: I don’t need a data source button, don't worry you can always add additional content later.
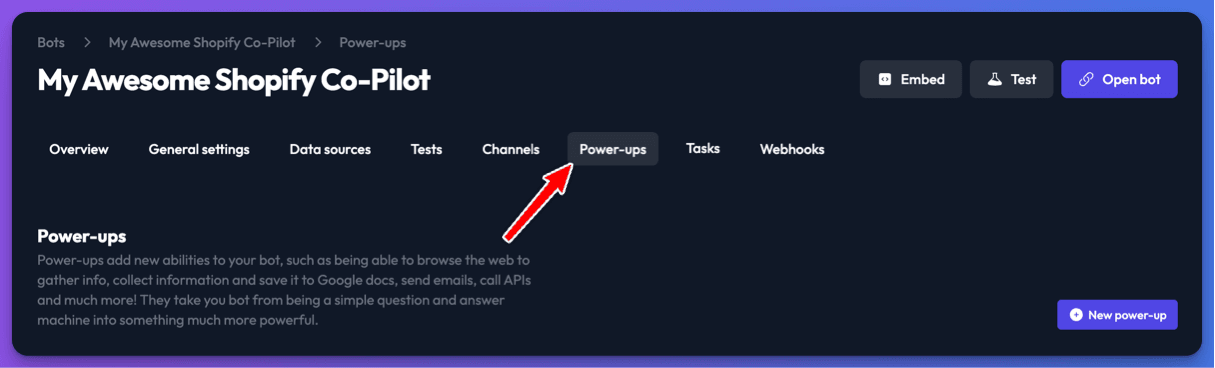
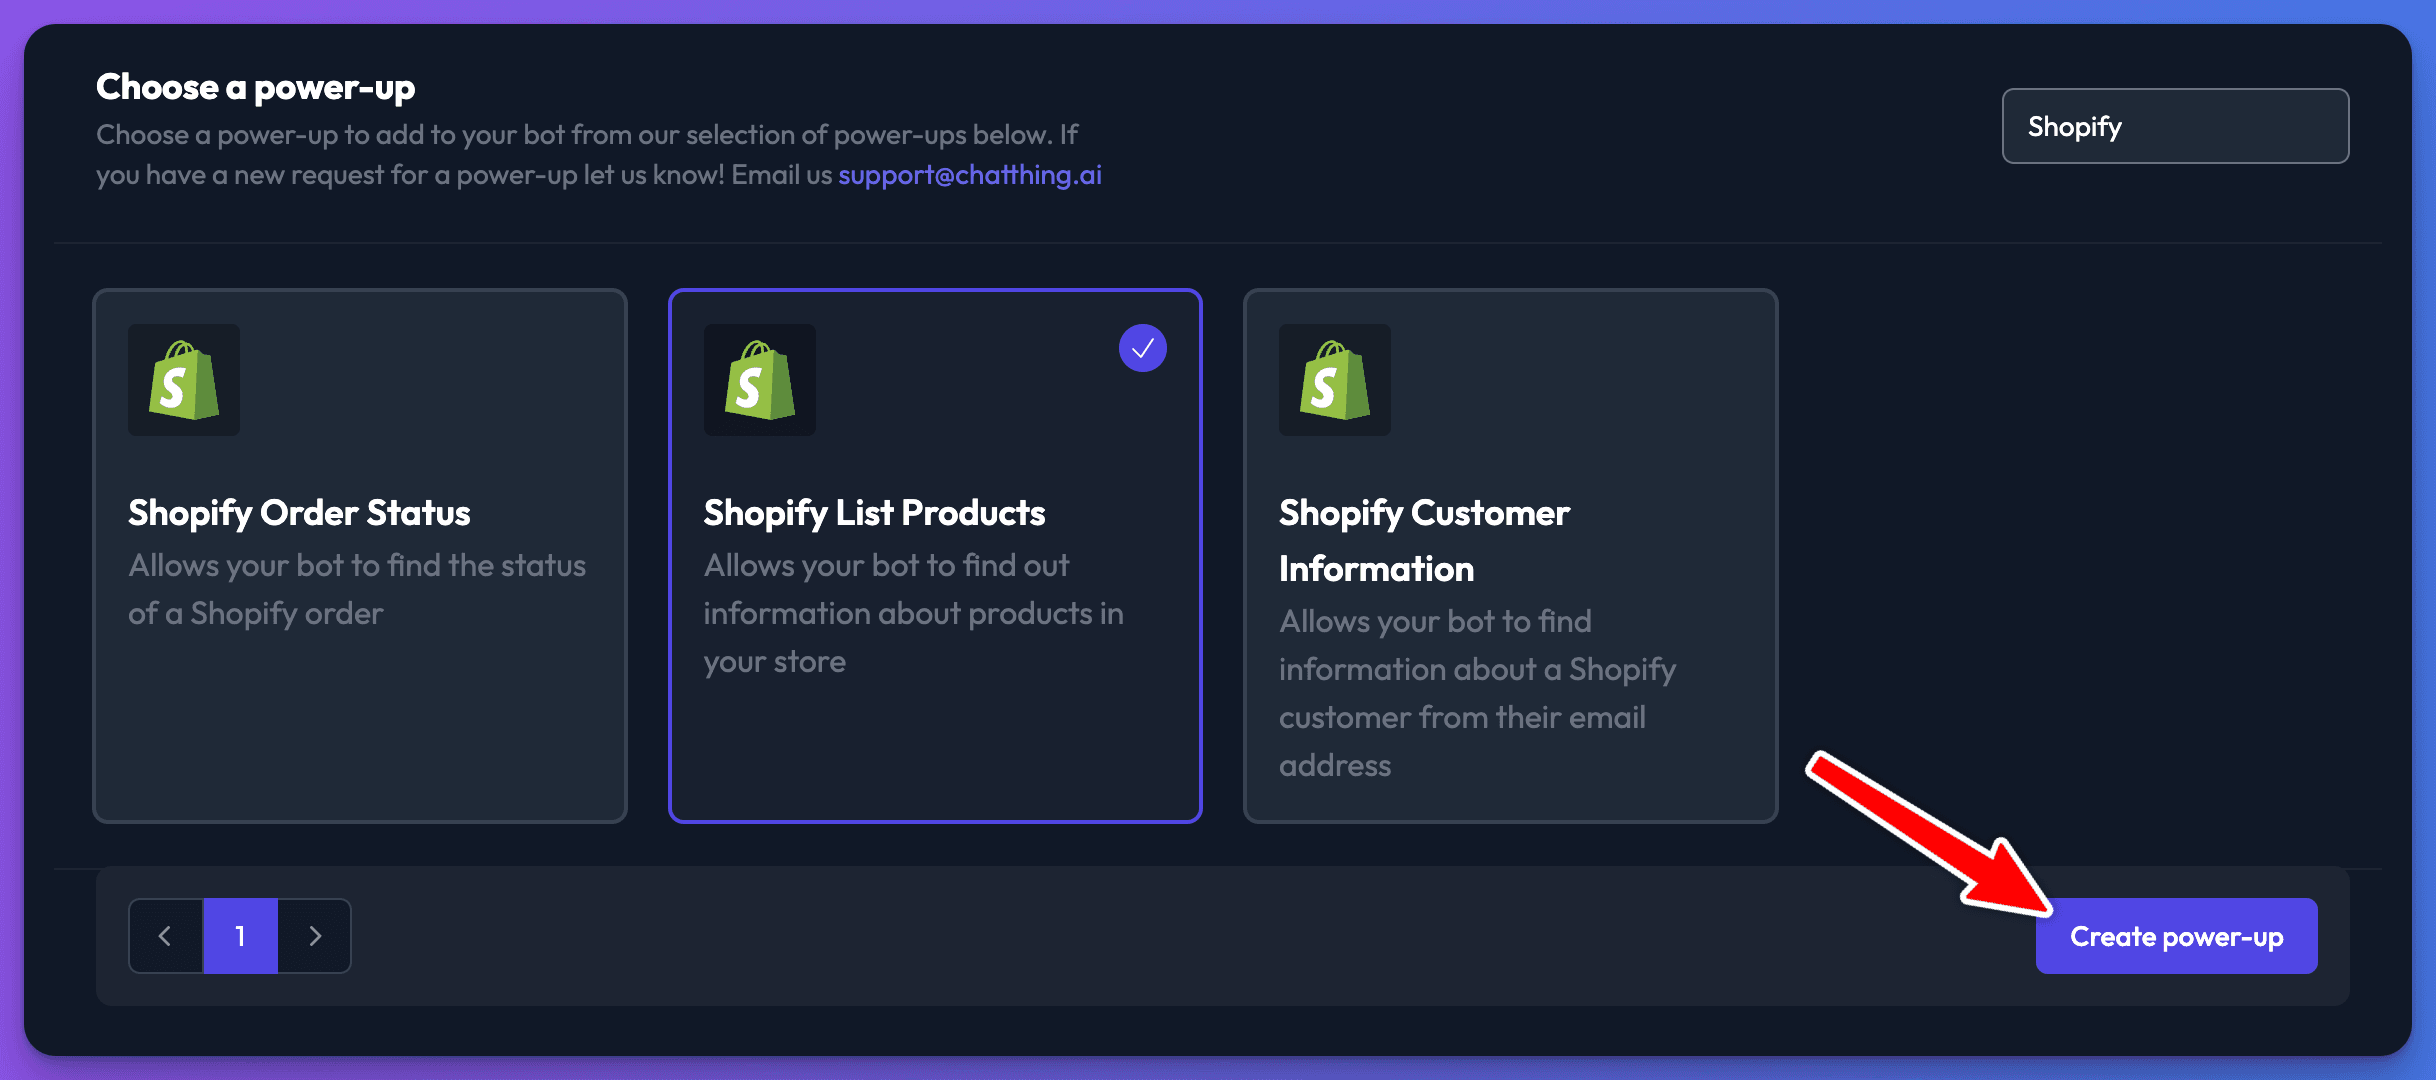
Shopify power-ups
Then from the next screen click on Add power-ups 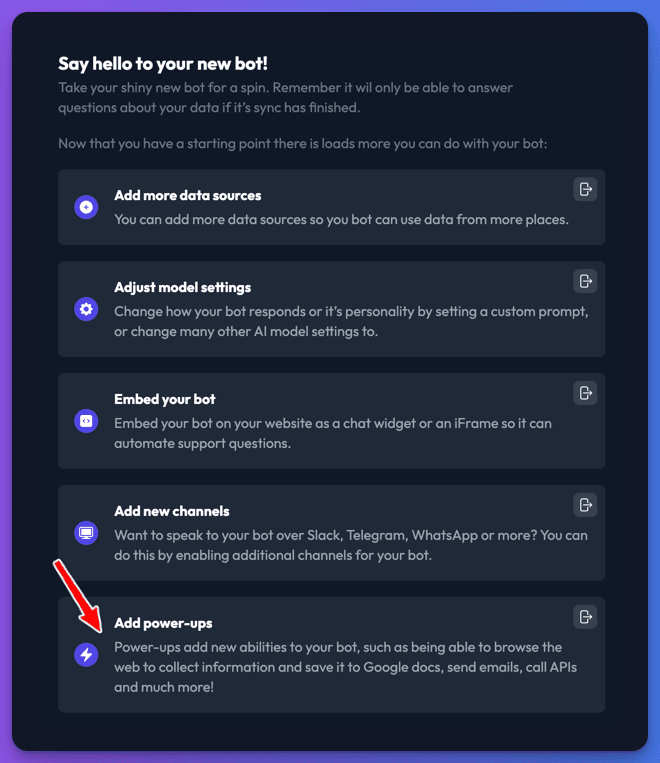
You can also add power-ups at any time from the bot dashboard.
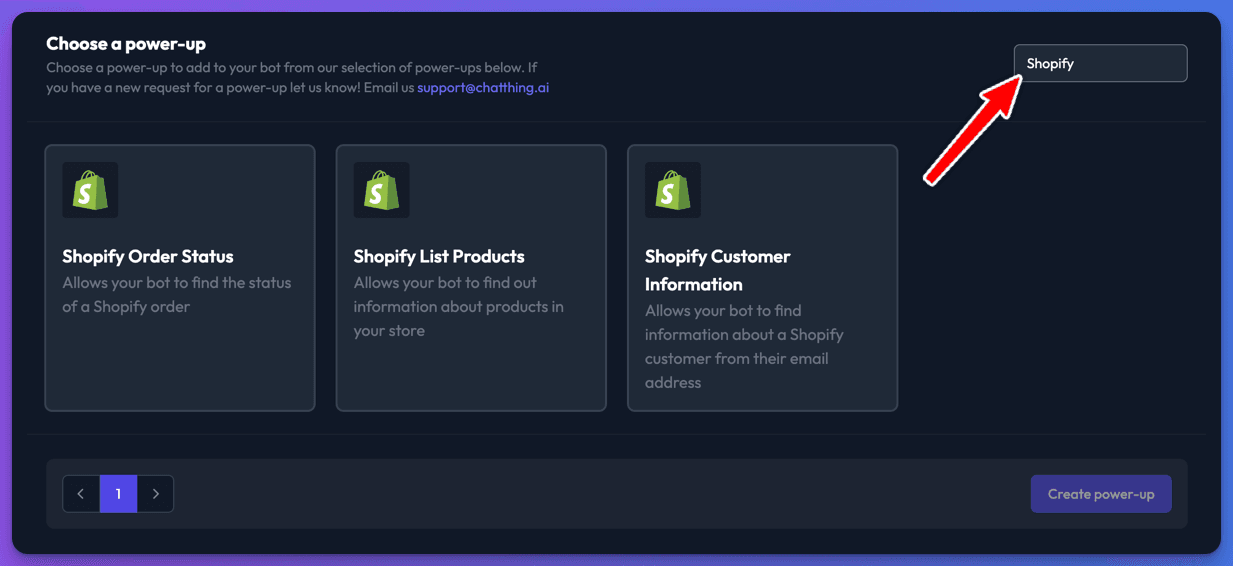
Depending on what you would like your bot to be able to do, at a minimum you should include the Shopify List Products power-up so you bot can access information about the products you sell. The other power-ups give your bot extra super powers but you should be careful about adding the Shopify Customer Information power-up this should never be used on front facing websites as it allows users to find out information about your customers from their email address alone.
Here's a little bit about what each power-up can do.
Shopify order status power-up
This power-up is very useful and will your bot to answer questions about the status of a customers order, they must provide their email address & the order number in order to do so.
Shopify list products power-up
This power-up is essential since it will allow your bot to help users with product recommendations, to help users find products & to answer questions about them.
Shopify customer information power-up
This power-up should be used with caution and it should never be added to public bots, since it allows your bot to find information about a customer from just their email address.
Let's add the Shopify List Products power-up now.
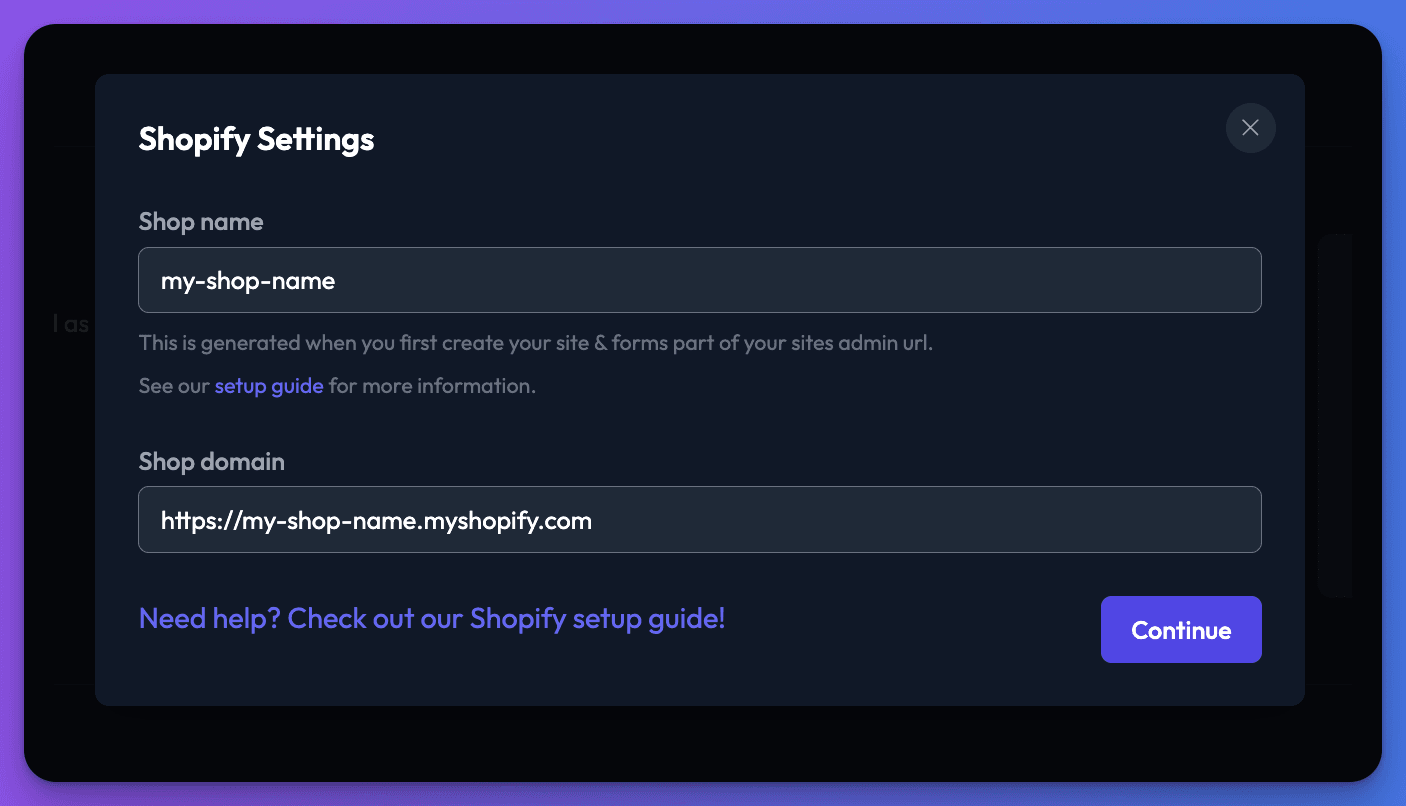
The first time you add a Shopify power up, you'll be asked to connect Chat Thing with your shopify account, we'll need access to be able to call Shopify's API end points on your behalf.
First you'll need to provide us with your stores name & it's URL. The easiest way to find your shop name is to access your Shopify admin interface as your shops name will form part of the url. The admin url for our demo store is https://admin.shopify.com/store/quickstart-e6e6ee06 so our shop name is quickstart-e6e6ee06
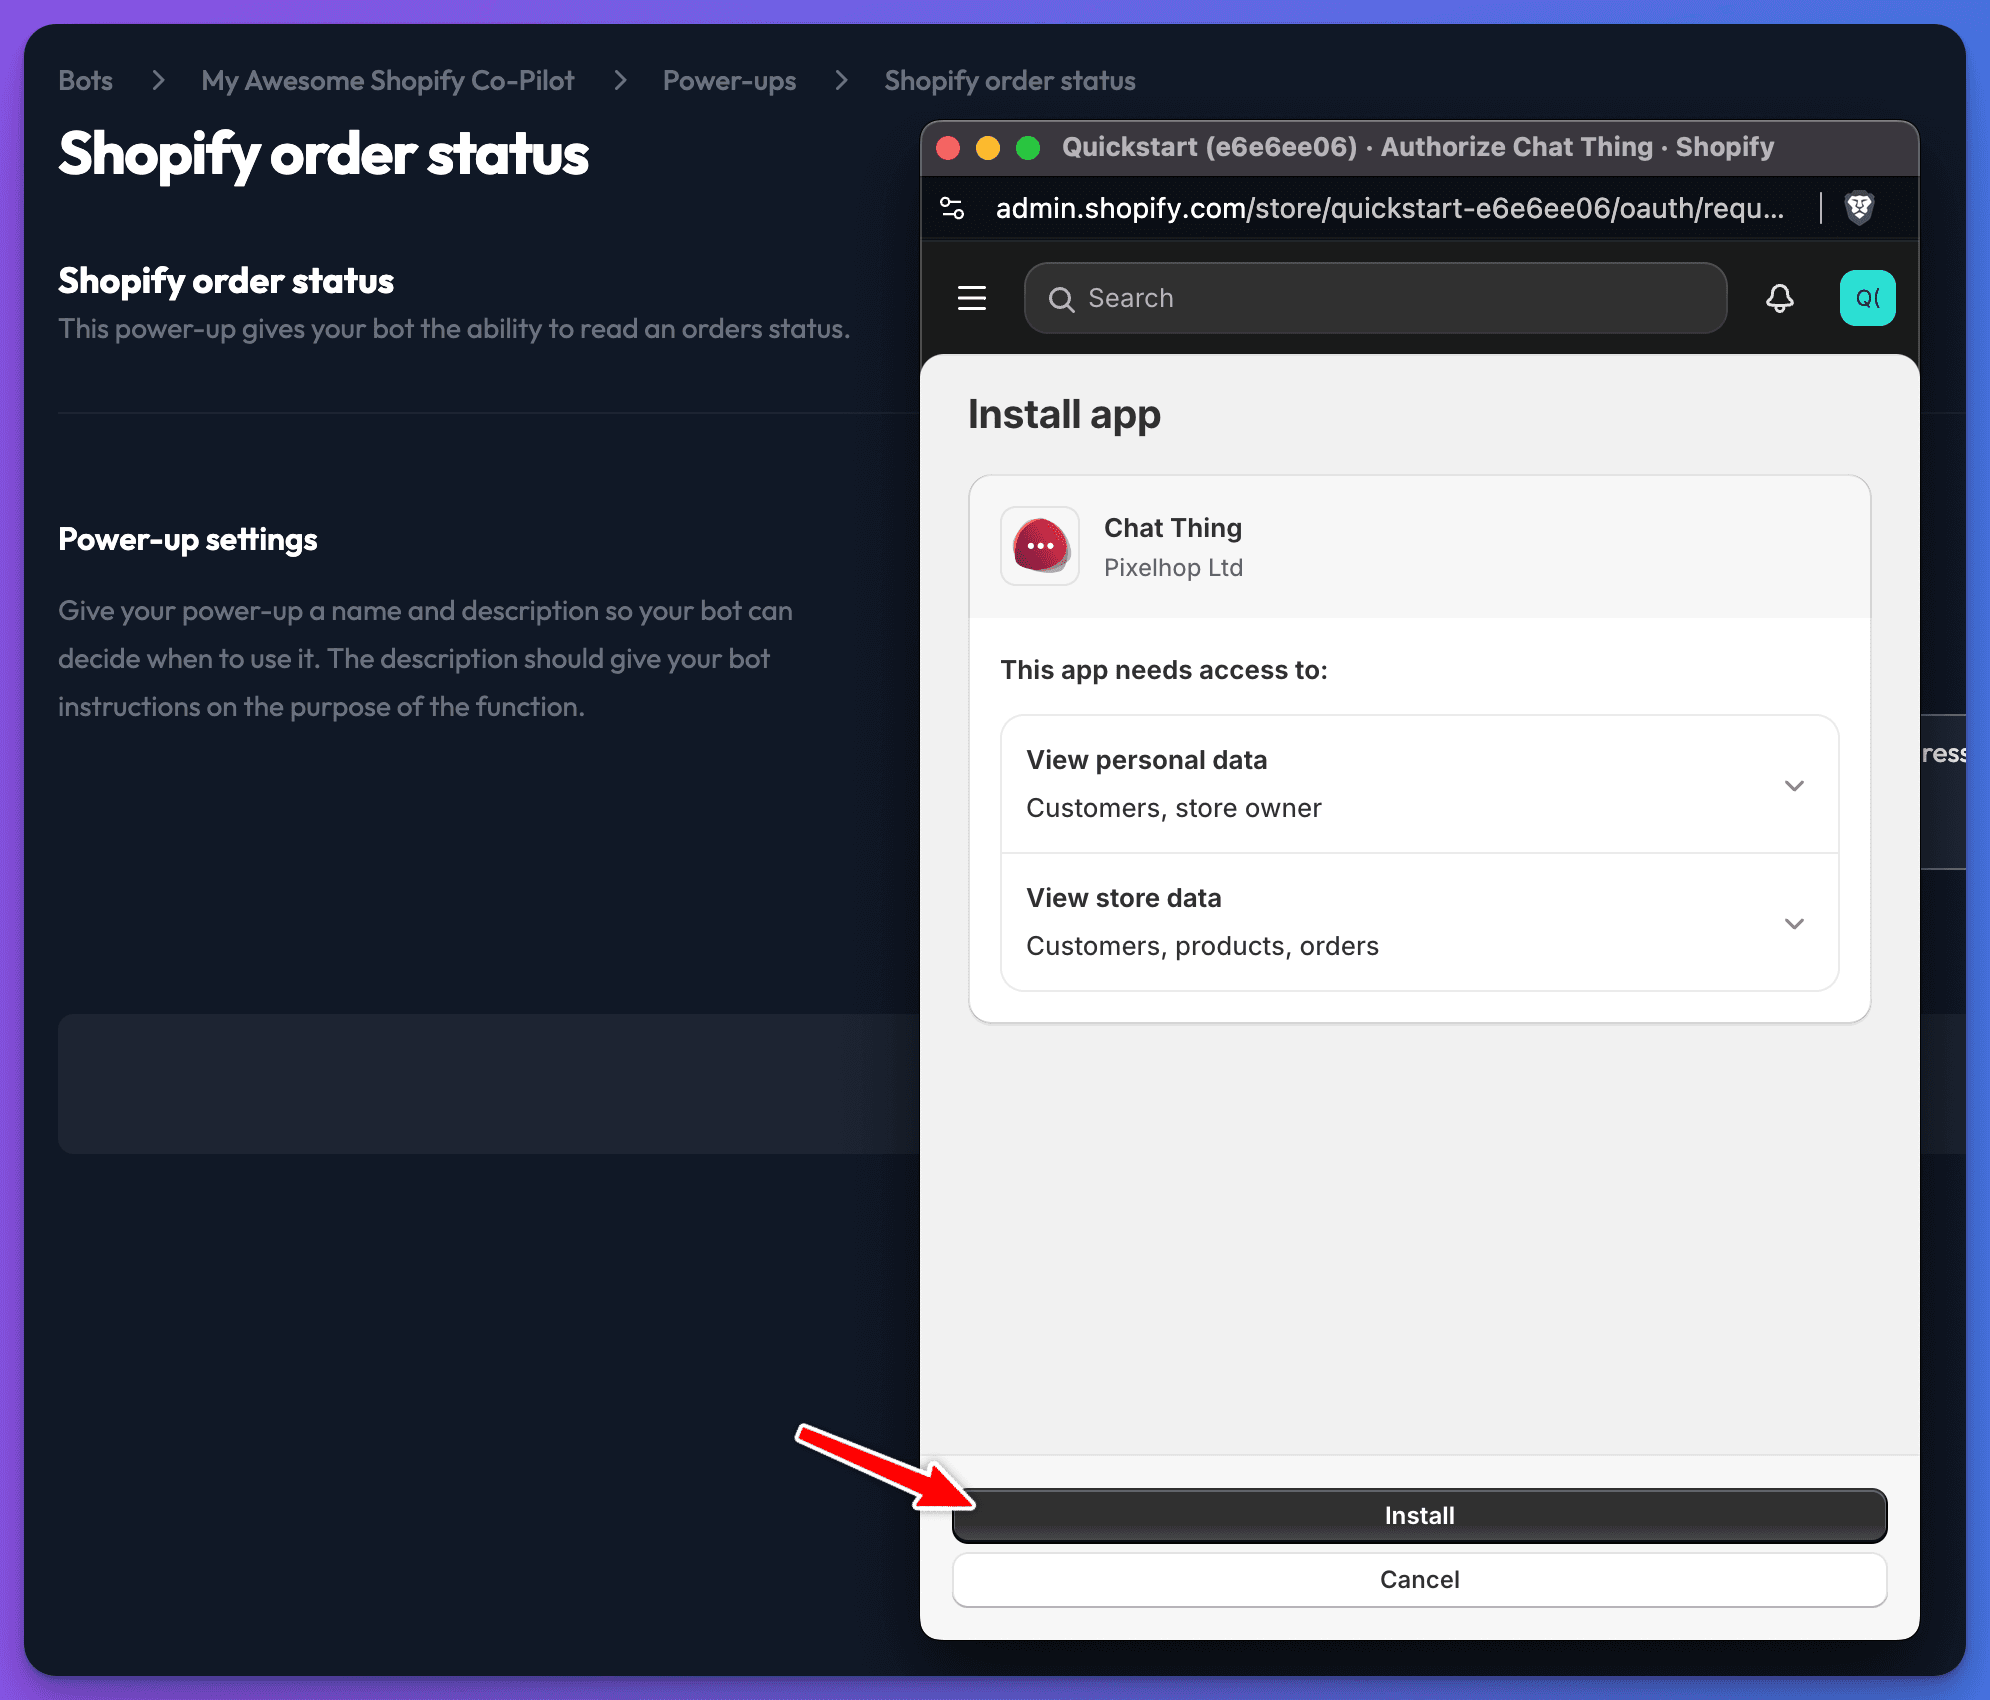
Next you'll be asked to install our Shopify App, this gives your bot permission to load information such as an orders status & product information from your store. This information won't be stored directly on our systems however it will be securely transferred to your chosen LLM to help it respond to a users query.
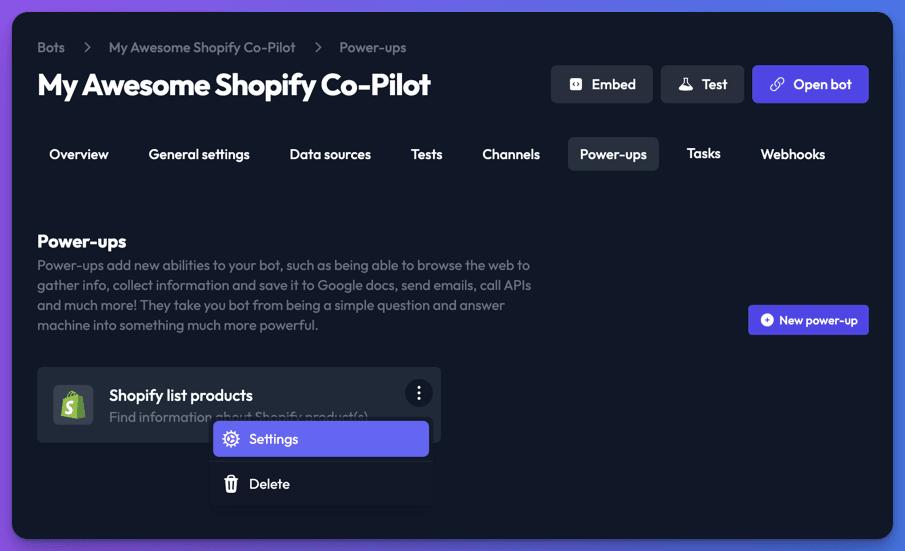
On the next screen you can give your power-up a name & description, if you find your bot isn't using the power up when it should, you can update the description to help it understand when it should use this power-up. If you decide to change the name, don't forget to change the reference to this power-up in the prompt.

Don't worry about this too much right now, the defaults will work well & if you need to, you can change the power-up name & description at any time by clicking on the power-up menu button & selecting Settings from the menu.
Web channel setup
Next we need to update a few key settings for the web channel, these are essential to ensure your Shopify co-pilot bot functions correctly. The web channel settings can be found here.
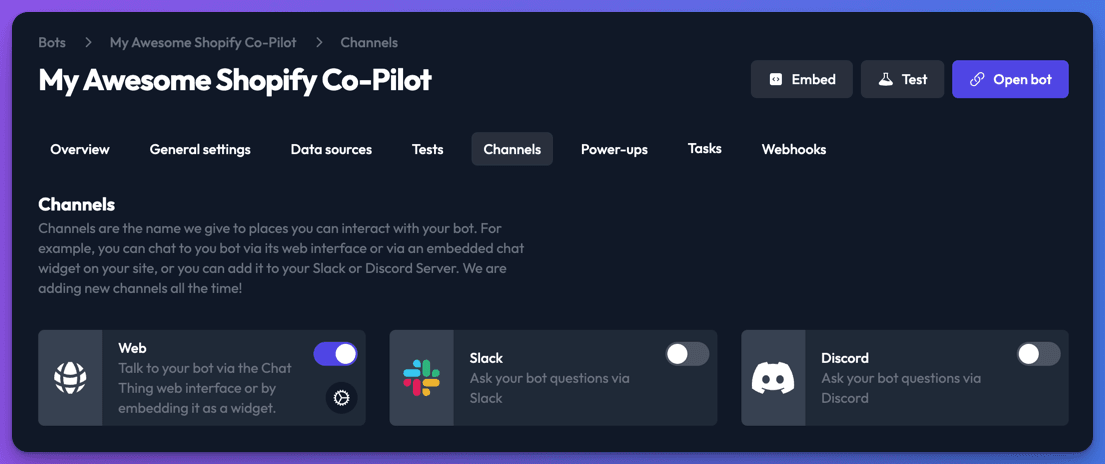
First we should enable the Persist chat option to ensure a conversation is maintained as the user navigates between pages on your store.

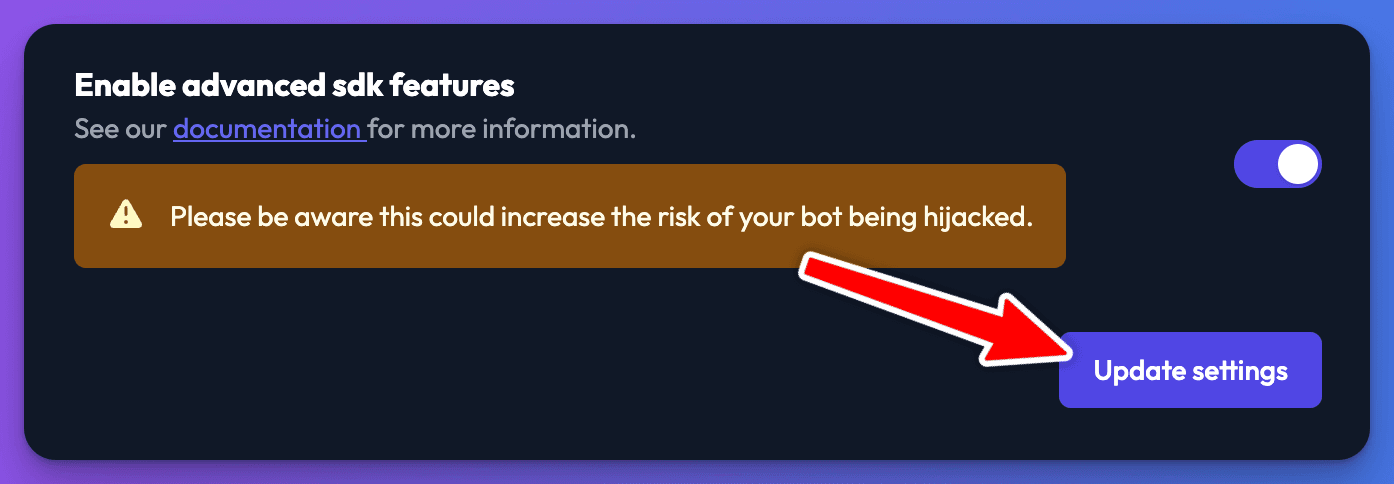
If you want your bot to be able to add products to the users basket, or provide navigation assistance you'll also need to enable the advanced SDK features.
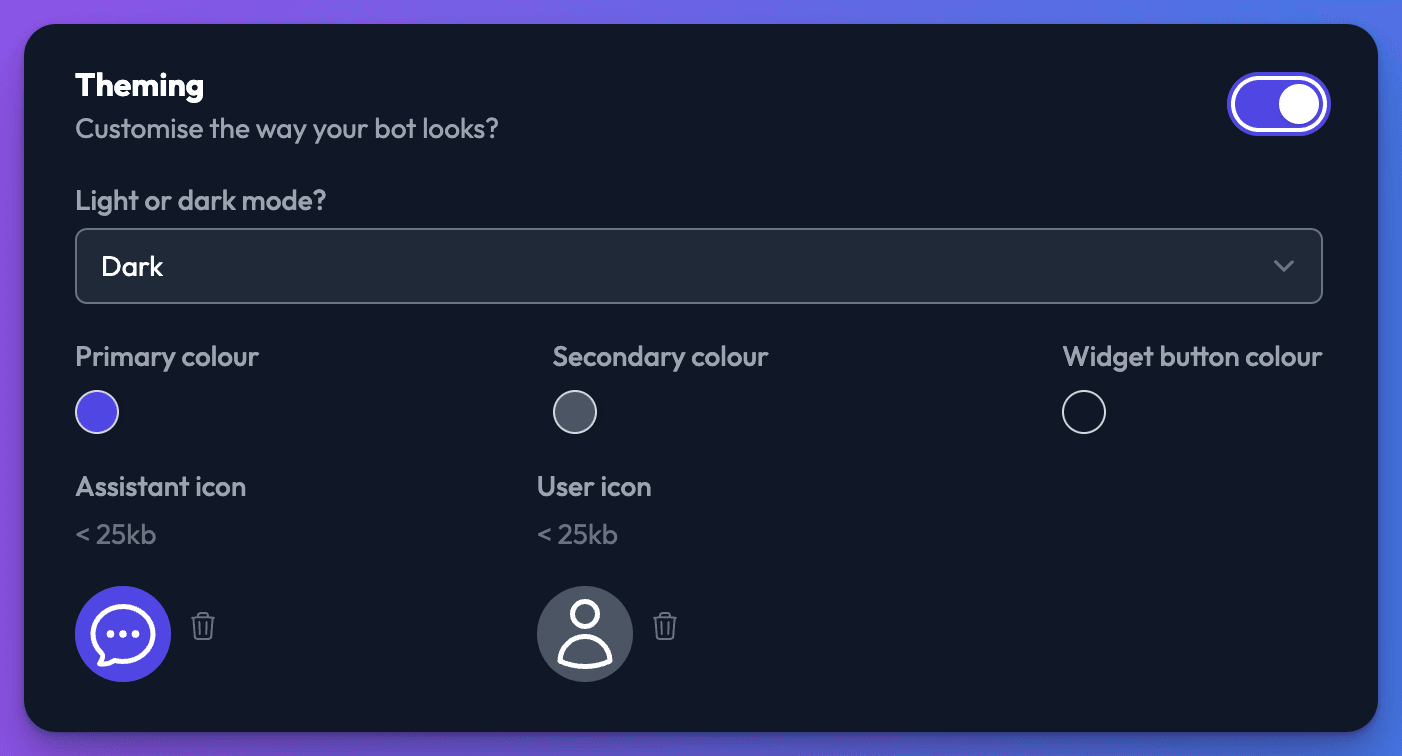
You may also want to take this opportunity to update the theme settings so the chat widget is more in keeping with the look and feel of your store. This should ideally be done before the next step, but don't worry you can do this at any time however you will need to update our Shopify app embed settings after making any changes which alter the chat widget.
Now you're ready to add the Chat Thing Shopify app to your Shopify store.
Shopify App configuration
Visit our app landing page
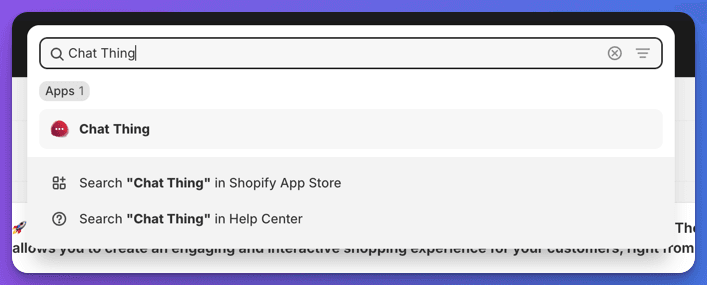
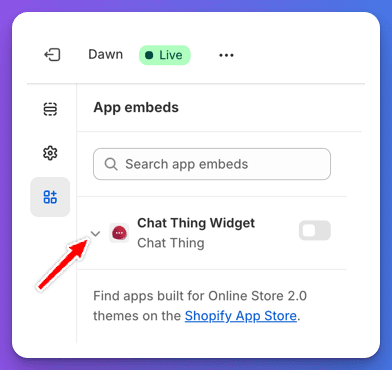
After logging into your Shopify stores admin interface, type "Chat Thing" into the search bar, then select our app.
Then need to click on the "Add Chat Widget" button to add our chat widget app embed to your stores theme. This will take you to the Shopify theme editor where you'll need to provide some configuration information before activating the app embed.
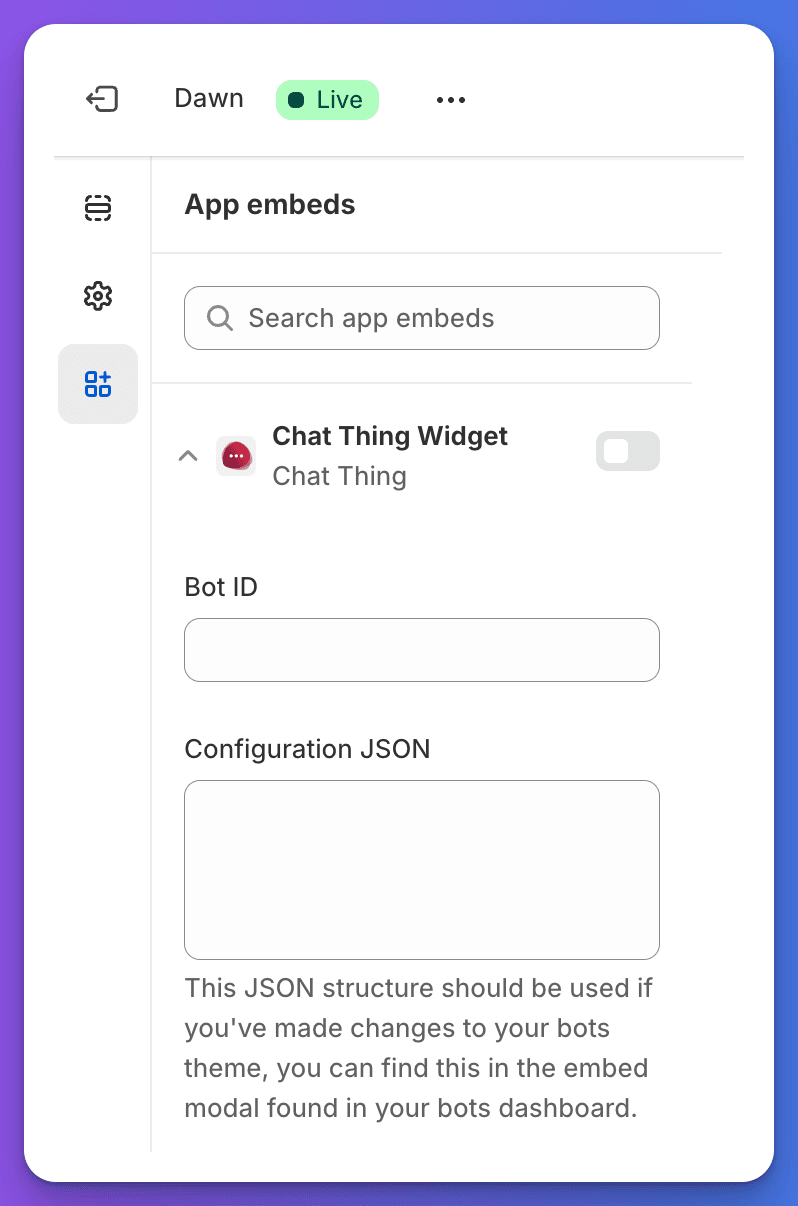
App embed configuration
Next you'll need some information from your bots dashboard you'll need the Bot ID but if you've chosen to modify your bots theme settings there will be an additional Configuration JSON structure to include.
You can find these from our Embed modal here.

At the bottom of this dialog you'll find the following. 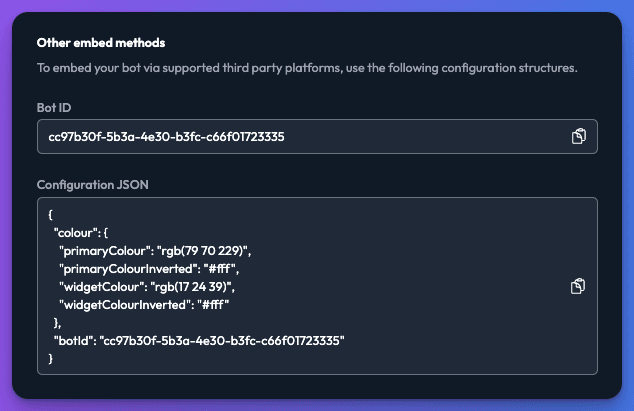
This information should be copy and pasted into the appropriate boxes in our Chat Thing Widget app embed within the Shopify theme editor.
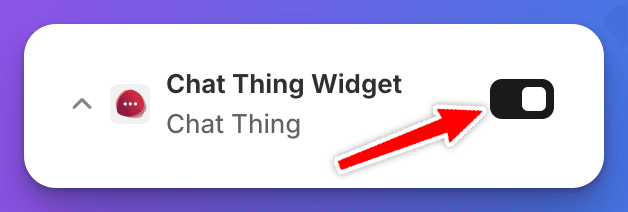
Then you're ready to enable the app embed, you should then see the chat icon appear in your store preview. You can test it out at this stage to make sure you're happy with it's behaviour and the look and feel of the chat interface, remember if you make changes to the theme settings going forward you'll need to update the configuration JSON structure in our Shopify app embed.
Once happy, to make the chat widget live, you need to click the Save button within the Shopify theme editor.
Troubleshooting
If our integration isn't working as you expect, we would appreciate it if you could double-check you've completed all the steps accurately. If you're still having trouble or something isn't clear from our instructions, please don't hesitate to get in touch or join our discord server for support.